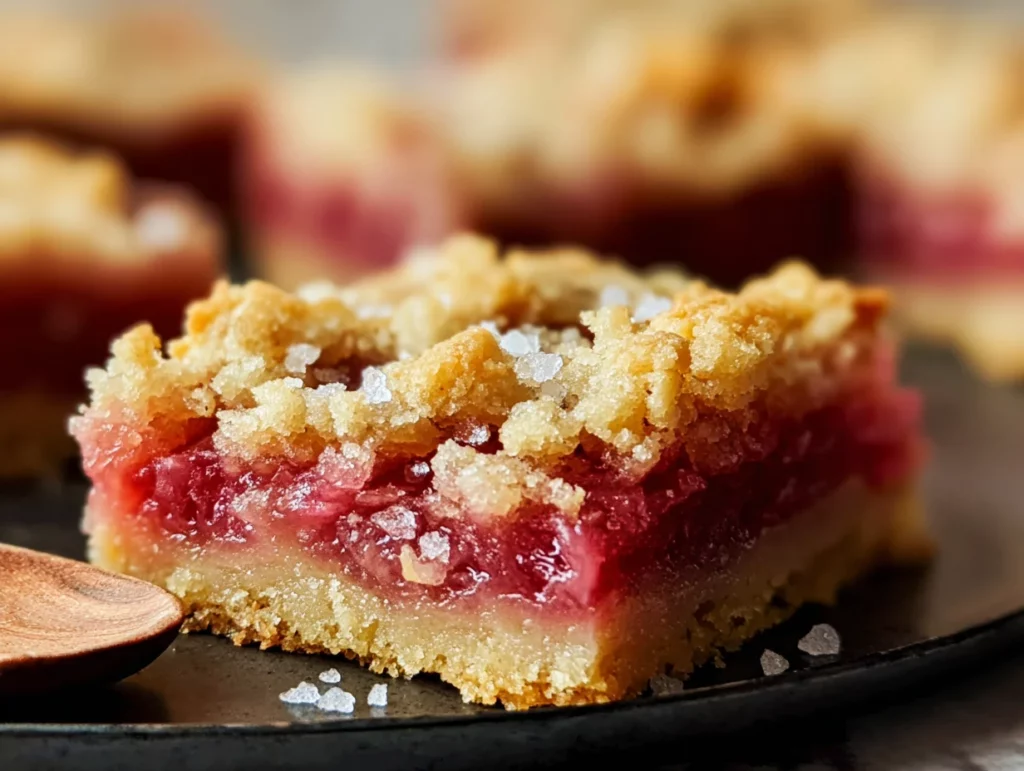
There’s something so magical about rhubarb season, isn’t there? As soon as those bright pink stalks start showing up at the farmer’s market or popping through the garden soil, I know it’s time to pull out one of my favorite springtime dessert recipes—Rhubarb Shortbread Bars. These bars are buttery, bright, and beautifully balanced between tart and sweet. Whether you’re hosting a brunch, enjoying an afternoon tea, or just craving something homemade with a little zing, this recipe hits all the right notes.
I’ll be honest—rhubarb wasn’t always a favorite of mine. It took one bite of these bars, years ago at a family picnic, to completely change my mind. I remember thinking, “Why don’t I bake with this more often?” And now, every spring without fail, these bars make a return to my kitchen (and usually don’t last more than a day on the counter).
The beauty of this recipe is in its simplicity. You don’t need any fancy ingredients or tools. Just a few pantry staples and some fresh rhubarb, and you’re well on your way to a dessert that feels a little fancy but is incredibly easy to make.
Let’s get started, shall we?
Ingredients You’ll Need
For the Shortbread Crust:
1 cup unsalted butter, softened
½ cup granulated sugar
2 cups all-purpose flour
¼ teaspoon salt
For the Rhubarb Filling:
3 cups chopped fresh rhubarb
¾ cup granulated sugar
2 tablespoons all-purpose flour
2 large eggs
1 teaspoon vanilla extract
STEP 1: Prep Your Baking Dish and Oven
Start by preheating your oven to 350°F (175°C). This ensures it’s ready to go as soon as your shortbread crust is mixed and pressed into the pan.
Line a 9×13-inch baking dish with parchment paper, making sure to leave a little overhang so you can lift the bars out easily once they’re cooled. If you’re not a fan of parchment, a light coating of butter or nonstick spray works fine too.

STEP 2: Make the Shortbread Crust
In a large mixing bowl, cream together the softened butter and ½ cup of granulated sugar. You’ll want to beat this until the mixture is light and fluffy—this step really sets the tone for that melt-in-your-mouth texture.
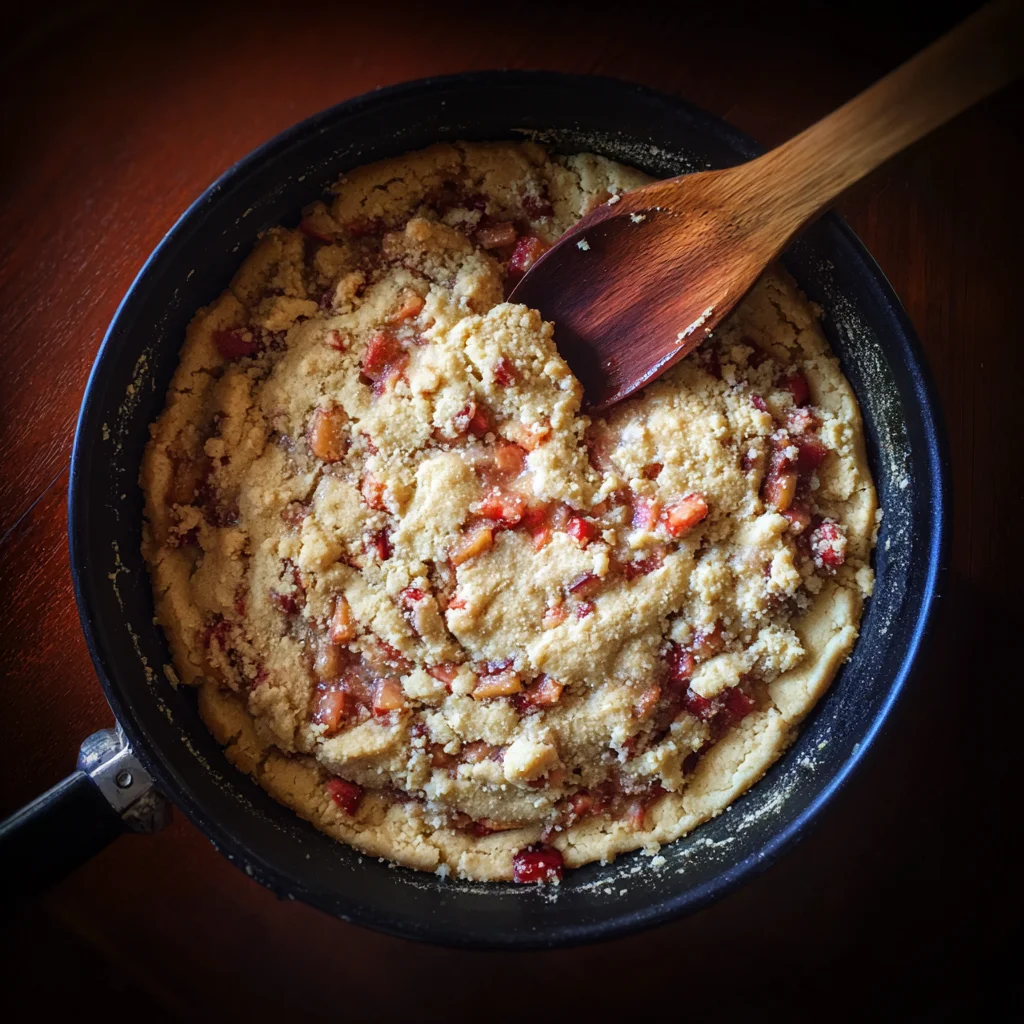
Next, add in the flour and salt, and mix until the dough becomes crumbly. Don’t worry if it doesn’t form a perfect ball; this is exactly what you want for shortbread. It should look sandy but stick together when you press it.
Grab your prepared baking dish and press the shortbread mixture evenly into the bottom. Try to get it as level as you can—it doesn’t need to be perfect, but even layers bake best. Pop it into the oven and bake for 18 to 20 minutes, just until the edges start to turn a light golden brown.
Once it’s done, remove it from the oven and set it aside. You’ll be pouring the rhubarb filling directly on top while it’s still warm, which helps everything bake together beautifully.
STEP 3: Mix Up the Rhubarb Filling
While your crust is baking (or cooling slightly), it’s the perfect time to prep your rhubarb layer.
In a medium bowl, whisk together the ¾ cup of sugar and 2 tablespoons of flour. This helps thicken the filling just enough to keep it from getting runny. Then add the eggs and vanilla extract, whisking until the mixture is smooth and well combined.
Now comes the star of the show—chopped fresh rhubarb. Stir it into the egg mixture, making sure all those pretty pink pieces are well coated.
Pour the rhubarb mixture evenly over the still-warm crust. It might seem a little liquidy at first, but don’t worry—it will set up beautifully in the oven.
STEP 4: Bake to Perfection
Once your filling is spread over the crust, return the pan to the oven. Bake for 35 to 40 minutes, or until the top is set and just beginning to turn golden at the edges. Your kitchen will smell absolutely incredible at this point—sweet, buttery, and slightly tangy.
Once done, remove from the oven and let the pan cool completely on a wire rack. This step is important. The filling needs time to set before you slice into it. If you’re in a hurry (or want cleaner slices), you can chill the bars in the fridge for an hour before cutting.
How to Perfect Rhubarb Shortbread Bars + Easy Variations You’ll Love
So now that you’ve got your bars baked and cooling (and your kitchen smelling absolutely divine), let’s talk about how to take these Rhubarb Shortbread Bars to the next level. This part of the process is all about adding those little tips and tricks that help you get the best results every single time—and maybe a few fun twists if you’re in the mood to play with flavors.
This recipe is a keeper just as it is, but I’ve tested it enough times (and shared it with enough friends) to know there are lots of ways to make it your own. Plus, I’ll walk you through exactly how to slice and store them so they stay fresh, delicious, and just as pretty as the day you made them.
Let’s pick up right where we left off.
STEP 5: Cooling and Cutting the Bars
Once the bars are out of the oven, it’s tempting to dive in right away—but try to resist! The filling needs time to fully set, especially if you want neat, clean slices.
Let the bars cool completely in the pan, ideally on a wire rack. This can take about 1 to 2 hours at room temperature. If you’re in a rush, or just want extra crisp lines when cutting, pop the pan into the fridge for about 30–60 minutes once it’s cooled a bit.
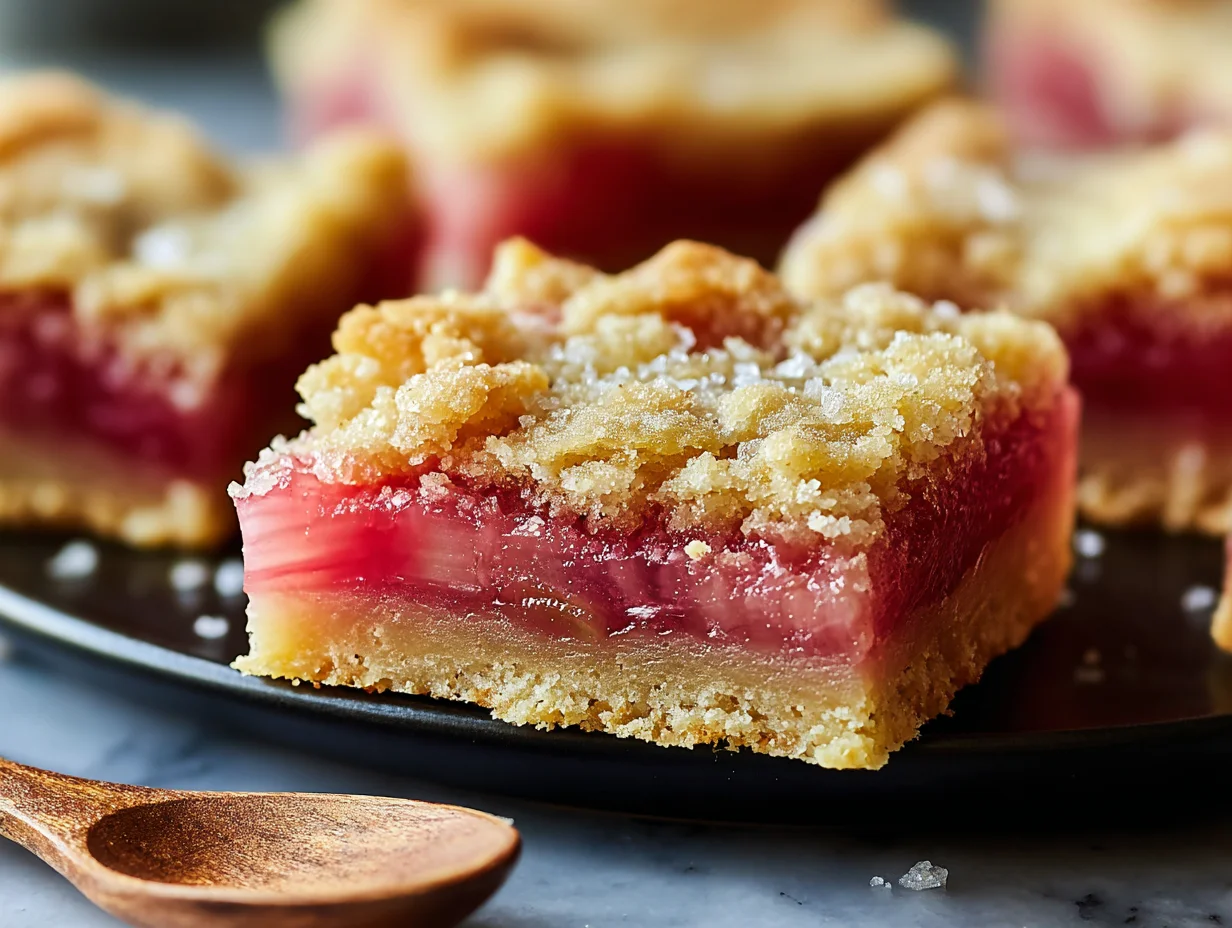
To slice, lift the entire slab out of the pan using the parchment overhang (if you used it), and place it on a cutting board. Use a sharp knife and wipe it clean between cuts for those bakery-style squares.
STEP 6: Storage Tips to Keep Them Fresh
Once sliced, you can store the bars in an airtight container at room temperature for up to two days. If you’re planning to keep them longer (which is rare in my house because they disappear fast), I recommend refrigerating them. They’ll stay fresh in the fridge for up to five days.
For longer storage, these bars also freeze beautifully. Just place them in a single layer on a baking sheet to freeze, then transfer to a freezer-safe container or zip-top bag. When you’re ready to enjoy them, just thaw in the fridge or on the counter.

Tips to Make This Recipe Foolproof
If you’re new to baking with rhubarb, or just want to get it right the first time, here are a few extra pointers that make a big difference:
Use fresh rhubarb if you can – It has the best texture and the brightest color. That said, frozen rhubarb works too! Just thaw it completely, drain well, and pat dry with paper towels before adding it to your filling. Too much extra moisture can throw off the texture.
Don’t skip the parchment paper – It makes removing and slicing the bars so much easier. If you’ve ever struggled to get that first bar out of the pan cleanly, parchment is your new best friend.
Bake the crust until just golden – You want that light golden color on the crust before adding the filling. If it’s too pale, it might not hold up well to the moisture in the topping.
Let it cool fully before slicing – I know I already said it, but it’s worth repeating. Cooling time = clean cuts and the best texture.
Simple Variations to Switch Things Up
What I love most about these bars (besides how ridiculously delicious they are) is how versatile they can be. Once you’ve got the base recipe down, here are a few ways to mix it up:
Add citrus – A little lemon zest (about 1 teaspoon) in the filling brings out the brightness of the rhubarb and adds a fresh, zippy twist. Orange zest works too for a slightly sweeter, more aromatic flavor.
Swap in strawberries – For a classic spring combo, replace 1 cup of rhubarb with 1 cup of chopped strawberries. The sweetness balances out the tartness of the rhubarb perfectly.
Go nutty – Add a sprinkle of chopped almonds or pecans on top of the filling before baking for a bit of crunch.
Make it gluten-free – Use your favorite gluten-free all-purpose flour blend for both the crust and filling. Just make sure it’s a 1:1 substitute that includes xanthan gum or a binding agent.
Dust with powdered sugar – Once the bars are cooled and sliced, a light dusting of powdered sugar makes them look even more bakery-worthy. This is especially nice if you’re serving them at a party or brunch.
Rhubarb Shortbread Bars: Your Questions Answered + Final Thoughts
Before we wrap things up, let’s take a minute to go through some of the most frequently asked questions about this recipe. Whether you’re new to baking with rhubarb or just want to make sure your bars turn out perfectly, these answers should help you feel a little more confident in the kitchen.
I always say the best recipes are the ones that not only taste amazing but also leave you feeling good about making them. Rhubarb Shortbread Bars check all those boxes. And if you’ve never baked with rhubarb before, this is the perfect way to start. Let’s dive into the FAQ!
FAQ: Common Questions About Rhubarb Shortbread Bars
1. Can I use frozen rhubarb instead of fresh?
Yes, absolutely! Frozen rhubarb works well in this recipe, but there are two important steps to follow: thaw it completely, and then drain it well. Once thawed, use paper towels to pat it dry. This prevents extra moisture from making the filling too wet or soggy.
2. How do I know when the bars are done baking?
The bars are ready when the filling is set in the center and the edges are just starting to turn golden. Give the pan a gentle shake—the middle should no longer jiggle. Depending on your oven, this takes about 35 to 40 minutes after adding the filling.
3. Can I make these bars gluten-free?
Yes! A good-quality gluten-free 1:1 baking flour will work in both the crust and the filling. Look for a blend that includes xanthan gum or another binder for the best texture.
4. What’s the best way to cut these bars cleanly?
Cool the bars completely, and then refrigerate them for an hour before slicing. Use a sharp knife and wipe it clean between cuts. Lining the pan with parchment paper makes lifting and cutting so much easier, too.
5. Can I reduce the sugar in the recipe?
You can, but keep in mind that rhubarb is naturally very tart. Reducing the sugar too much may throw off the balance between sweet and tangy. If you’d like a slightly less sweet version, try cutting back by about ¼ cup in the filling—but I wouldn’t go lower than that.
6. How should I store leftovers?
Store any leftovers in an airtight container. They’re fine at room temperature for up to 2 days, but if you want to keep them longer, refrigerate them for up to 5 days. You can also freeze them for up to 2 months—just thaw before serving.
7. Can I use other fruits instead of rhubarb?
You sure can. This recipe also works beautifully with berries like strawberries, raspberries, or blueberries. Keep in mind that some fruits have more moisture than rhubarb, so you may want to slightly increase the flour in the filling or reduce the fruit slightly.
Final Thoughts: A Spring Treat You’ll Want to Make Again and Again
If you’ve made it this far, chances are you’re already dreaming about your first bite—and I don’t blame you. These Rhubarb Shortbread Bars are everything I love about seasonal baking: simple ingredients, beautiful color, and flavors that really shine.
The buttery, tender shortbread crust pairs so well with the bright, slightly tangy rhubarb filling. It’s a dessert that feels nostalgic and new all at once—kind of like something your grandma would make, but with a little modern twist.
I hope you’ll give this recipe a try the next time you spot fresh rhubarb at the market. And when you do, I’d love to hear how it goes! Did you add lemon zest? Try it with strawberries? Store it for later or eat the whole batch in one weekend (no judgment here)?
Print
Rhubarb Shortbread Bars
- Author: Andrew Recipes
Description
Rhubarb shortbread bars are a delightful treat that perfectly balance the buttery richness of shortbread with the tart brightness of fresh rhubarb. With a tender, melt-in-your-mouth base and a soft, slightly tangy rhubarb topping, these bars are a wonderful way to showcase this unique seasonal ingredient. Ideal for spring and early summer, they make a beautiful addition to brunches, tea tables, or simple everyday snacking.
Ingredients
For the shortbread crust
1 cup unsalted butter, softened
½ cup granulated sugar
2 cups all-purpose flour
¼ teaspoon salt
For the rhubarb filling
3 cups chopped fresh rhubarb
¾ cup granulated sugar
2 tablespoons all-purpose flour
2 large eggs
1 teaspoon vanilla extract
Instructions
Preheat the oven to 350°F. Line a 9×13-inch baking dish with parchment paper or lightly grease it.
In a large bowl, cream together the butter and sugar until light and fluffy. Add the flour and salt, mixing until the dough is crumbly but holds together when pressed.
Press the shortbread mixture evenly into the bottom of the prepared pan. Bake for 18 to 20 minutes, or until lightly golden. Remove from the oven and set aside.
While the crust is baking, prepare the filling. In a medium bowl, whisk the sugar and flour together. Add the eggs and vanilla, and whisk until smooth. Stir in the chopped rhubarb until evenly coated.
Pour the rhubarb mixture over the warm crust and spread it out evenly.
Return the pan to the oven and bake for 35 to 40 minutes, or until the filling is set and lightly golden around the edges.
Allow the bars to cool completely in the pan before cutting into squares.
Notes
Fresh rhubarb works best for this recipe, but frozen rhubarb can be used if it’s well-drained and patted dry. For a citrusy twist, add a teaspoon of lemon zest to the filling. These bars can be stored in an airtight container at room temperature for up to two days or refrigerated for longer freshness. For a cleaner cut, chill the bars before slicing.

