
There’s something special about a cookie that’s both buttery and melt-in-your-mouth soft, especially when it comes with a burst of strawberry flavor and a chocolatey kiss on top. These Strawberry Kiss Cookies are the ultimate treat—perfect for Valentine’s Day, birthdays, or just because you’re craving something sweet. The best part? They’re easy to make, and that pop of pink makes them as beautiful as they are delicious.
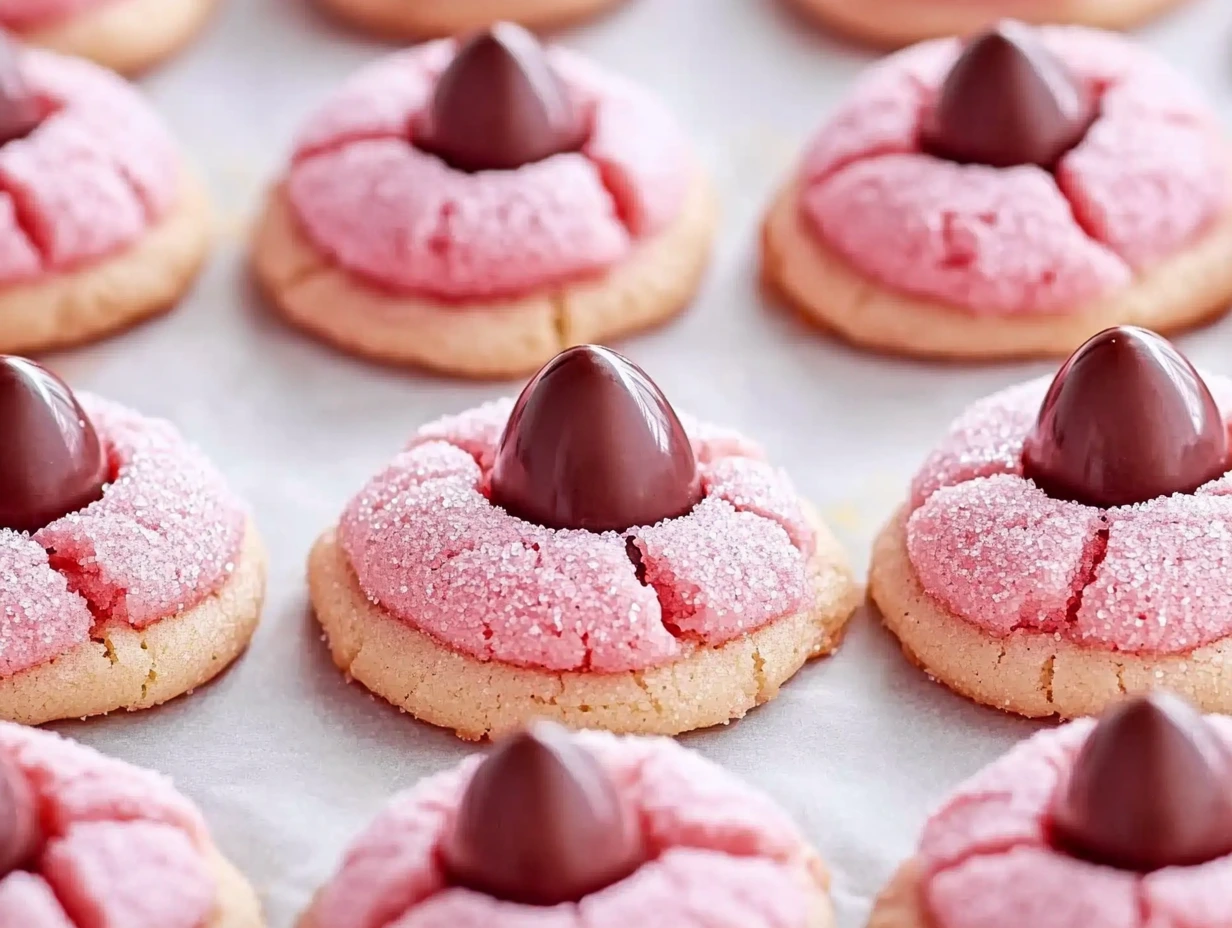
These cookies have a delicate strawberry flavor, thanks to strawberry gelatin in the dough, and a slight crunch from rolling them in sugar before baking. When you press a chocolate kiss into the center while they’re still warm, it melts just enough to create a creamy, irresistible topping. Whether you’re baking these for a loved one or just treating yourself, they’re guaranteed to bring a little extra joy to your day.
Now, let’s dive right into how to make these delightful cookies!
Ingredients for the Perfect Strawberry Kiss Cookies
Before we get started, here’s everything you’ll need:
For the Cookie Dough
- 1 cup unsalted butter, softened – This gives the cookies their rich, buttery texture.
- 1 cup granulated sugar – Adds sweetness and a slight crispness to the edges.
- 1 large egg (room temperature) – Helps bind everything together for a soft and chewy bite.
- 1 teaspoon vanilla extract – Enhances the flavor.
- ½ teaspoon almond extract (optional) – Adds a hint of nuttiness, complementing the strawberry and chocolate.
- 2 cups all-purpose flour – The base of the cookies, keeping them soft yet sturdy.
- ½ teaspoon baking powder – Helps the cookies rise slightly.
- ½ teaspoon salt – Balances the sweetness.
- 3 tablespoons strawberry gelatin (Jell-O mix) – Infuses the cookies with strawberry flavor and gives them that signature pink color.
For Rolling & Topping
- ¼ cup granulated sugar – Used to coat the dough balls before baking, adding a light crunch.
- 24 chocolate kisses, unwrapped – Hershey’s Kisses work perfectly, adding a smooth chocolate center.
Step 1: Preheat the Oven & Prep the Baking Sheets
Before anything else, preheat your oven to 350°F (175°C). Lining two baking sheets with parchment paper will prevent the cookies from sticking and make cleanup a breeze. If you don’t have parchment paper, a light spray of nonstick cooking spray works too.
Step 2: Make the Cookie Dough
This cookie dough comes together quickly, and the vibrant pink color makes it extra fun to work with.
- Cream the Butter and Sugar – In a large mixing bowl, beat the softened butter and granulated sugar together until light and fluffy. This takes about 2–3 minutes with an electric mixer. Creaming the butter and sugar properly ensures soft, tender cookies.
- Add the Wet Ingredients – Mix in the egg, vanilla extract, and almond extract (if using). Beat until fully incorporated.
- Combine the Dry Ingredients – In a separate bowl, whisk together the flour, baking powder, salt, and strawberry gelatin powder. The gelatin not only gives these cookies their signature strawberry taste but also adds a beautiful pink hue.
- Mix the Dough – Gradually add the dry ingredients to the wet ingredients, mixing until a soft dough forms. If the dough feels a bit sticky, chilling it for about 15 minutes can make it easier to handle.
At this point, your kitchen should be filled with the sweet scent of vanilla and strawberry—a sure sign that something delicious is on the way.

Step 3: Shape & Coat the Cookies
Now comes the fun part—shaping and rolling the dough.
- Scoop out small portions of dough (about 1 inch in size) and roll them into smooth balls between your palms.
- Roll each dough ball in granulated sugar, making sure it’s evenly coated. This step adds a slight crunch to the outer layer while keeping the inside soft and buttery.
- Place the sugar-coated dough balls 2 inches apart on the prepared baking sheets. Giving them enough space ensures they bake evenly without spreading into each other.

Baking and Finishing Your Strawberry Kiss Cookies
Now that the dough is prepped and ready, it’s time to bake these sweet, buttery treats. This step is where the magic happens—watching the cookies puff up and fill your kitchen with the scent of strawberries and sugar is one of the best parts of baking.
Once they’re out of the oven, we’ll add the final touch: a chocolate kiss right in the center. The warmth of the freshly baked cookie softens the chocolate just enough to create a delicious contrast between the strawberry flavor and the creamy chocolate. Let’s get baking!
Step 4: Bake the Cookies to Perfection
With your cookie dough balls coated in sugar and placed on the baking sheets, it’s time to get them in the oven.
- Bake at 350°F (175°C) for 8–10 minutes. Keep a close eye on them—they should be slightly puffed, with the edges set but not browned.
- Avoid overbaking. These cookies are meant to stay soft and tender. If they start turning golden brown around the edges, take them out immediately.
- Let them rest for 1 minute on the baking sheet. This helps them set just enough to hold their shape when you add the chocolate kiss.
At this stage, the cookies may look slightly underdone in the center, but don’t worry—they will firm up as they cool.
Step 5: Add the Chocolate Kiss
Now comes the signature touch that makes these cookies irresistible.
- Unwrap the chocolate kisses ahead of time so they’re ready to go as soon as the cookies come out of the oven.
- Gently press a chocolate kiss into the center of each warm cookie. The heat will slightly melt the base of the chocolate, allowing it to stick without fully melting.
- Let the cookies cool completely on the baking sheet. Moving them too soon can cause the chocolate to lose its shape, so patience is key!
Once cooled, the cookies will have the perfect balance of soft, buttery texture with a creamy chocolate center. They’re now ready to be enjoyed!
Baking Tips & Variations
Want to make your Strawberry Kiss Cookies even better? Here are a few tips and variations to try.
- Chill the Dough if It’s Too Soft – If your kitchen is warm, the dough might be a bit sticky. A quick 15-minute chill in the fridge will make it easier to roll into balls.
- Try Different Chocolate Kisses – While classic milk chocolate kisses are a favorite, you can experiment with white chocolate, dark chocolate, or even caramel-filled kisses for a fun twist.
- Use a Cookie Scoop for Even Sizes – To get perfectly uniform cookies, use a small cookie scoop to portion out the dough. This ensures they bake evenly.
- Make Them Extra Festive – For special occasions like Valentine’s Day, roll the cookies in pink or red sanding sugar instead of regular sugar for a sparkly finish.
- Store Them Properly – These cookies stay soft for days if kept in an airtight container at room temperature. If you want to keep them fresh for longer, freeze them and thaw when ready to enjoy.
Frequently Asked Questions & Final Thoughts
Strawberry Kiss Cookies are a delightful treat, but if you’ve never made them before, you might have a few questions. Whether it’s about ingredient swaps, storage tips, or troubleshooting common issues, I’ve got you covered!
Frequently Asked Questions
1. Can I use fresh strawberries instead of strawberry gelatin?
No, fresh strawberries contain too much moisture and will change the texture of the dough. The strawberry gelatin provides both flavor and color without affecting the consistency.
2. What if my cookies spread too much?
If your cookies are spreading too much while baking, try chilling the dough for 15–30 minutes before rolling it into balls. Also, make sure your butter isn’t too soft—it should be slightly cool to the touch.
3. Can I make these cookies ahead of time?
Yes! You can prepare the dough in advance and store it in the fridge for up to 48 hours before baking. You can also freeze the baked cookies for up to 3 months in an airtight container.
4. Why did my chocolate kisses melt completely?
If your kisses melted too much, it’s possible that the cookies were too hot when you added them. Try waiting 1–2 minutes before pressing the chocolate into the cookies. Cooling the cookies on the baking sheet instead of transferring them to a wire rack also helps them hold their shape.
5. Can I use a different flavor of gelatin?
Absolutely! While strawberry is the classic choice, you can experiment with raspberry, cherry, or even orange gelatin for a fun twist. Each flavor will give the cookies a different color and taste.
6. How should I store these cookies?
Keep them in an airtight container at room temperature for up to 5 days. If you live in a warm climate and want to prevent the chocolate from softening, store them in the fridge.
7. Can I double the recipe?
Yes! This recipe doubles well. Just be sure to bake in batches so the cookies have enough space on the baking sheets to spread properly.
Final Thoughts: Why You’ll Love These Cookies
Strawberry Kiss Cookies are as fun to make as they are to eat. The combination of soft, buttery dough, a hint of strawberry, and a creamy chocolate center makes them completely irresistible. Whether you’re baking these for a holiday, a party, or just because you love cookies, they’re sure to be a hit.
So go ahead—preheat your oven, grab your ingredients, and treat yourself to a batch of these sweet, strawberry-flavored delights. And if you try them, let me know how they turned out! Happy baking!
Print
Strawberry Kiss Cookies
- Author: Andrew Recipes
Description
These soft, buttery, and strawberry-flavored cookies are rolled in sugar for a slight crunch and topped with a melty chocolate kiss—the perfect sweet treat for Valentine’s Day or any special occasion!
Ingredients
For the Cookie Dough:
1 cup unsalted butter, softened – For a rich, buttery base.
1 cup granulated sugar – Adds sweetness and slight crispness.
1 large egg, at room temperature – Helps with structure and texture.
1 tsp vanilla extract – Enhances the flavor.
½ tsp almond extract (optional) – Adds a hint of nuttiness.
2 cups all-purpose flour – Creates a soft and tender texture.
½ tsp baking powder – Helps the cookies rise slightly.
½ tsp salt – Balances the sweetness.
3 tbsp strawberry gelatin (Jell-O mix) – For a burst of strawberry flavor and a pop of pink color!
For Rolling & Topping:
¼ cup granulated sugar – For rolling the dough balls before baking.
24 chocolate kisses, unwrapped – Hershey’s Kisses work great!
Instructions
1️⃣ Preheat and Prepare
Preheat your oven to 350°F (175°C).
Line two baking sheets with parchment paper.
2️⃣ Make the Cookie Dough
In a large mixing bowl, beat butter and sugar together until light and fluffy (about 2–3 minutes).
Add the egg, vanilla extract, and almond extract (if using) and mix until fully incorporated.
In a separate bowl, whisk together flour, baking powder, salt, and strawberry gelatin powder.
Gradually add the dry ingredients to the wet ingredients, mixing until a soft dough forms.
3️⃣ Shape & Coat the Cookies
Scoop 1-inch dough balls and roll them between your palms.
Roll each dough ball in granulated sugar, ensuring it’s evenly coated.
Place the coated dough balls 2 inches apart on the prepared baking sheets.
4️⃣ Bake to Perfection
Bake for 8–10 minutes, or until the edges are just set and the cookies appear slightly puffed.
Remove from the oven and let sit for 1 minute before adding the chocolate kisses.
5️⃣ Add the Chocolate Kiss 💋🍫
Immediately press a chocolate kiss into the center of each warm cookie.
Allow the cookies to cool completely on the baking sheet, which helps the chocolate kiss hold its shape.
Notes
✅ Extra Strawberry Flavor – Add ½ teaspoon of strawberry extract for even more fruity goodness! 🍓
✅ Chocolate Lovers’ Twist – Use white chocolate or dark chocolate kisses for a fun variation! 🍫
✅ Festive Look – Sprinkle the cookies with red or pink sanding sugar before baking for a sparkly touch. ✨
✅ Make Ahead – Store unbaked dough balls in the fridge for up to 3 days before baking.
These Strawberry Kiss Cookies are cute, delicious, and irresistibly sweet! Perfect for gifting, Valentine’s Day, baby showers, or just a fun baking day! 💕🍓💋

