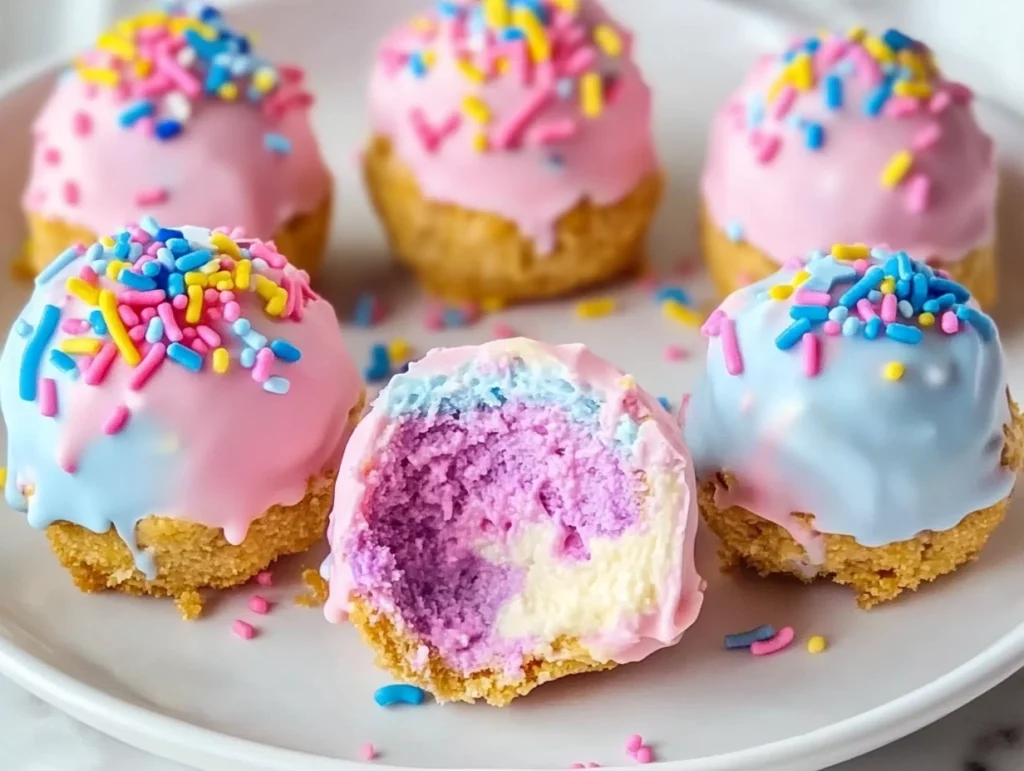
If you’re looking for a dessert that’s not only delicious but also looks like it came straight from a fairy tale, then you’re in for a treat! These Unicorn Cheesecake Bites are everything you could dream of—creamy, colorful, and sprinkled with edible magic. Perfect for birthdays, parties, or just a fun weekend bake, these bite-sized cheesecakes will bring a smile to anyone’s face.
The best part? They’re super easy to make! Even if you’re not a pro baker, you’ll still end up with gorgeous, swirly cheesecakes that taste just as good as they look. Ready to dive in? Let’s make some magic happen! ✨
The Magic Behind Unicorn Cheesecake Bites
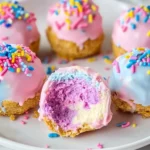
These little cheesecakes start with a buttery graham cracker crust that provides the perfect crunchy contrast to the smooth, creamy cheesecake filling. What makes them truly special is the vibrant pastel swirls created using food coloring. Once baked and chilled, they get the ultimate unicorn-approved makeover with whipped cream, edible glitter, and gold star sprinkles. Trust me, these will be the star of any dessert table!
Before we jump into the step-by-step process, here’s what you’ll need:
Ingredients
For the Cheesecake Batter:
- 24 oz cream cheese, softened
- ¾ cup granulated sugar
- ¼ cup sour cream
- 1 tsp vanilla extract
- 3 large eggs
- Food coloring (pink, blue, purple)
For the Crust:
- 1 cup graham cracker crumbs
- 4 Tbsp unsalted butter, melted
For Decoration:
- Whipped cream
- Edible glitter
- Gold star sprinkles
Step 1: Prepare Your Baking Setup
Before we get started, preheat your oven to 325°F (163°C) and line a muffin tin with paper liners. This will make it super easy to remove the cheesecake bites once they’re baked and chilled.
Step 2: Make the Buttery Graham Cracker Crust
The crust is an important base for our cheesecake bites because it adds a delicious crunch to every bite. Here’s how to make it:
1️⃣ In a small bowl, mix the graham cracker crumbs and melted butter until well combined. The texture should feel like wet sand—if you squeeze some in your hand, it should hold together slightly.
2️⃣ Press about 1 tablespoon of the crumb mixture into the bottom of each muffin cup. You can use the back of a spoon or a small cup to really pack it down so it holds its shape after baking.
3️⃣ Once all the muffin cups are filled, set the pan aside while we move on to the cheesecake batter.

Step 3: Create the Creamy Cheesecake Batter
Now comes the good stuff—the rich, velvety cheesecake filling that melts in your mouth. Here’s how to make it:
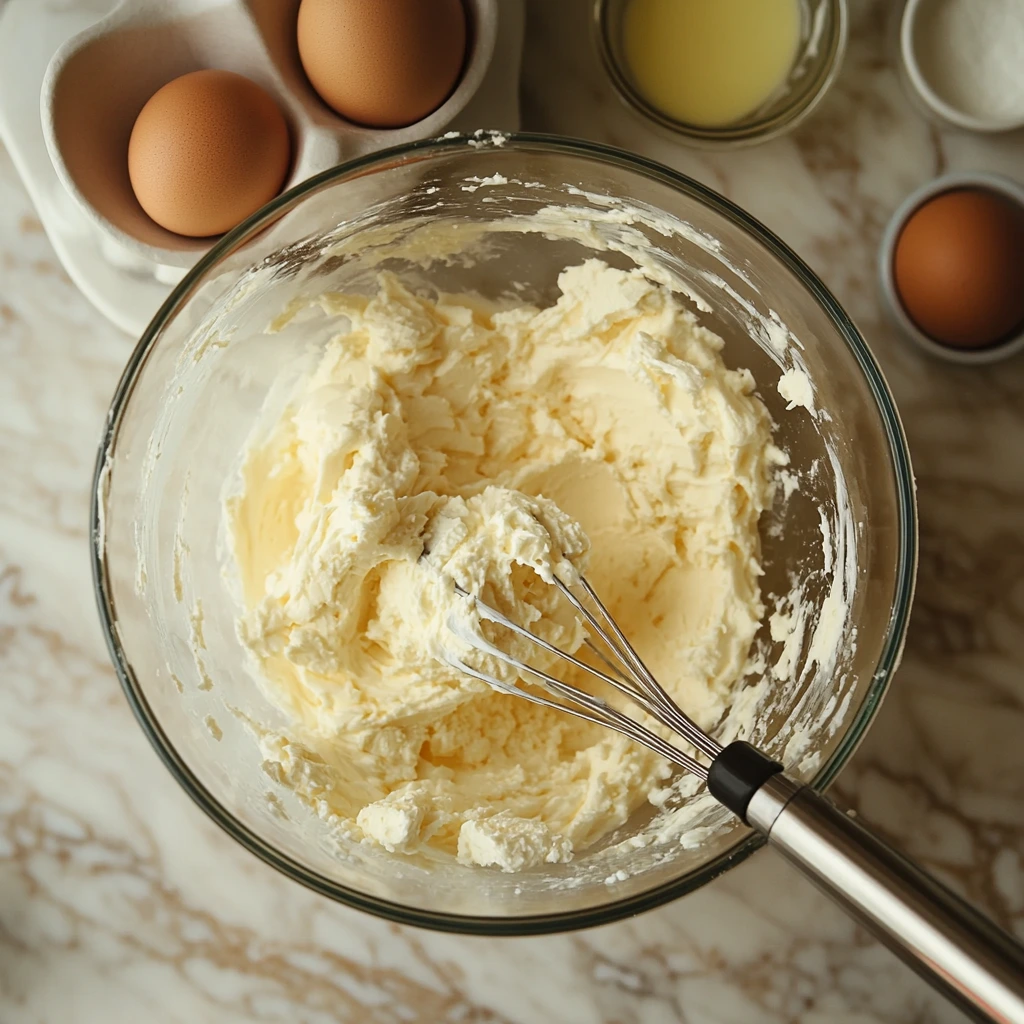
1️⃣ In a large mixing bowl, beat the cream cheese until smooth. It’s important that your cream cheese is softened, or you’ll end up with lumps in your batter.
2️⃣ Add in the granulated sugar, sour cream, and vanilla extract, then mix until everything is fully combined and creamy.
3️⃣ Beat in the eggs one at a time, making sure each one is fully mixed in before adding the next. This helps create a smooth, airy batter.
At this point, your cheesecake batter is ready—but we’re not stopping here! Let’s add some unicorn magic.
Step 4: Add the Colors of the Rainbow
To make these cheesecake bites truly unicorn-worthy, we need to create those beautiful pastel swirls:
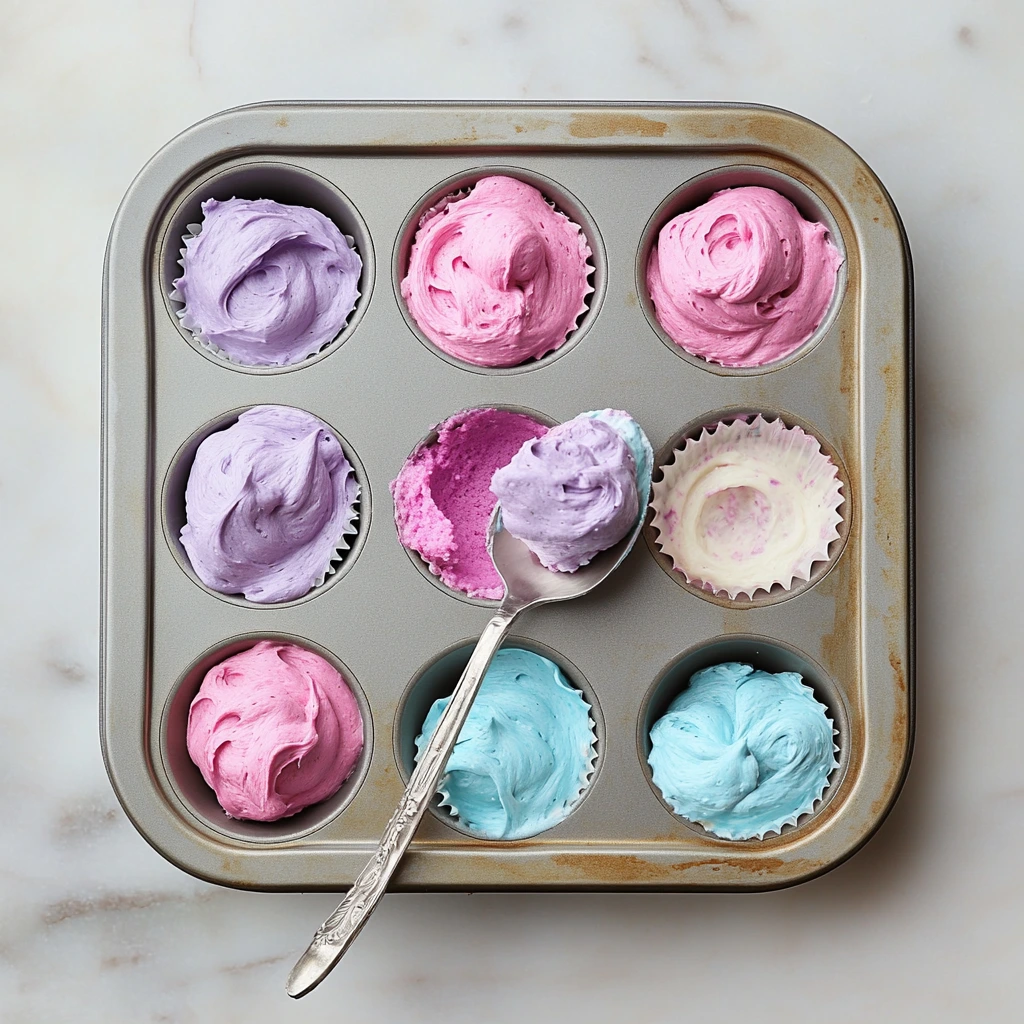
1️⃣ Divide the cheesecake batter evenly into three separate bowls.
2️⃣ Add a few drops of pink, blue, and purple food coloring to each bowl. Stir until the colors are vibrant and fully mixed in.
3️⃣ Now for the fun part! Drop spoonfuls of each colored batter into the muffin cups, layering the colors randomly.
4️⃣ Use a toothpick or skewer to gently swirl the colors together. Be careful not to overmix, or you’ll lose the distinct swirls and end up with a muddy color.

Step 5: Bake the Cheesecakes Until Just Set
Baking cheesecake is a delicate process because we want them to be creamy and smooth without overbaking. Here’s how to get it just right:
1️⃣ Place the muffin tin in the preheated oven (325°F/163°C) and bake for 18-20 minutes. The edges should look set, but the centers should still have a slight jiggle when you gently shake the pan.
2️⃣ Don’t overbake! The cheesecake bites will continue to cook as they cool. Overbaking can lead to cracks, and we want these beauties to be silky smooth.
3️⃣ Once done, turn off the oven and slightly crack the oven door. Let the cheesecakes sit inside for 5 minutes. This gradual cooling helps prevent cracks from forming.
4️⃣ Remove the muffin tin from the oven and let the cheesecakes cool in the pan for about an hour before transferring them to the fridge.
Step 6: Chill to Perfection
Cheesecake tastes best when fully chilled, so patience is key here!
1️⃣ After cooling at room temperature, transfer the muffin tin to the refrigerator and let the cheesecake bites chill for at least 2 hours (or overnight for best results).
2️⃣ Once fully chilled, gently remove each cheesecake from the muffin liners. They should hold their shape perfectly!
Pro Tip: If you’re short on time, you can place them in the freezer for 30 minutes instead of chilling for 2 hours. Just make sure not to let them freeze solid.
Step 7: Time to Decorate!
This is where the magic truly happens! Get ready to turn your mini cheesecakes into sparkling, unicorn-worthy treats.
Add the Whipped Cream Swirl
1️⃣ Using a piping bag (or a spoon), add a generous swirl of whipped cream to the top of each cheesecake bite.
2️⃣ You can use store-bought whipped cream or make your own by whipping 1 cup of heavy cream with 2 tablespoons of powdered sugar until soft peaks form.
Sprinkle Some Magic
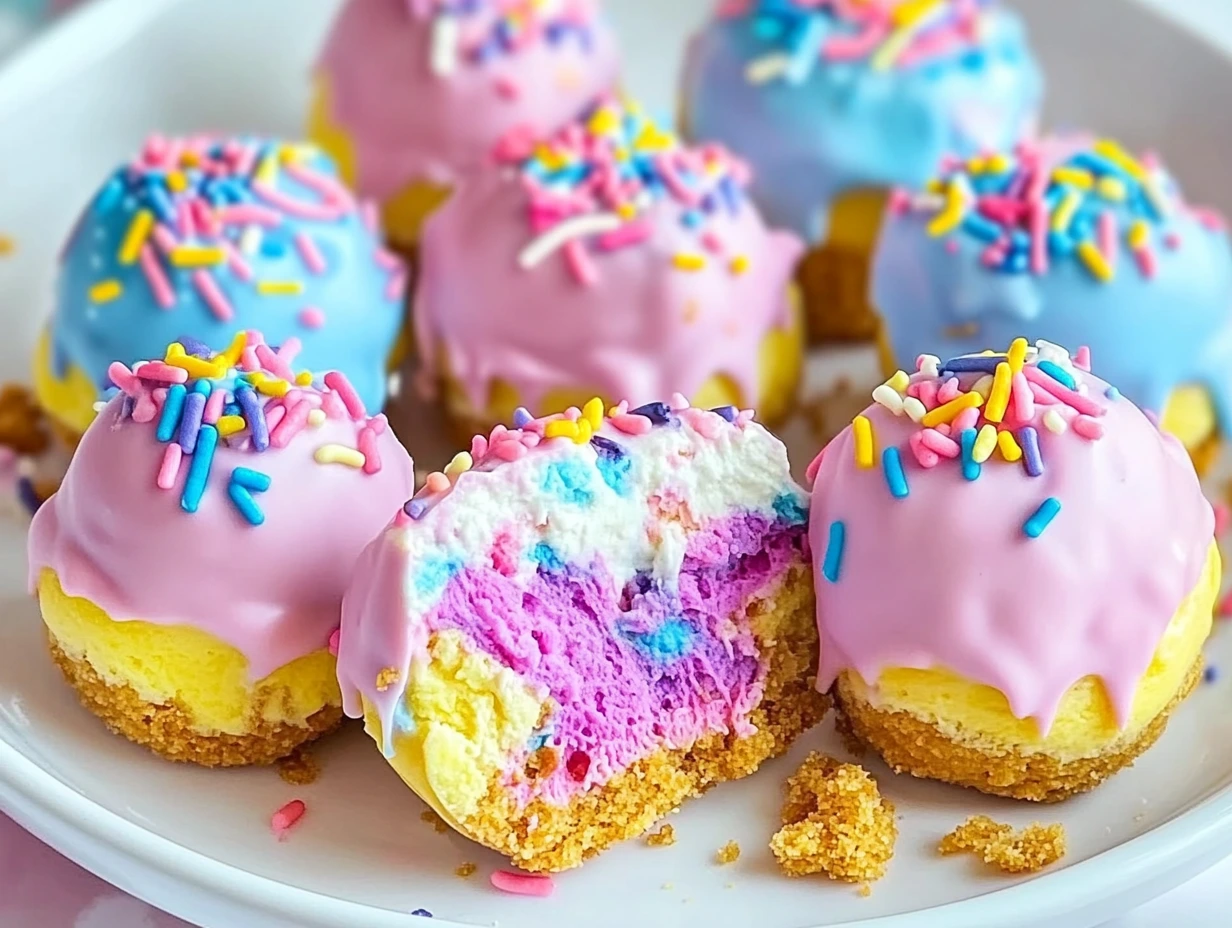
1️⃣ Edible glitter: Lightly dust the tops of your cheesecakes with shimmery edible glitter to give them that magical unicorn sparkle.
2️⃣ Gold star sprinkles: Scatter a few gold star sprinkles on each cheesecake for an extra touch of whimsy.
3️⃣ Extra flair: If you want to go all out, you can add small candy pearls, rainbow sprinkles, or even tiny fondant unicorn horns!
Fun Variations to Try!
Want to put your own spin on these unicorn cheesecake bites? Here are some fun ways to customize them:
- Rainbow Version: Instead of just pink, blue, and purple, divide the batter into five or six colors (yellow, green, orange, etc.) for a full rainbow effect. 🌈
- Galaxy Cheesecake Bites: Use dark blue, black, and purple with silver sprinkles to create a galactic theme. 🌌
- Chocolate Swirl: Mix melted white chocolate into the cheesecake batter for an even richer, creamier bite. 🍫
- Cotton Candy Flavor: Add a few drops of cotton candy flavoring to the batter for a taste that’s just as fun as it looks! 🍬
Unicorn Cheesecake Bites – Part 3: FAQs & Final Thoughts!
You did it! Your Unicorn Cheesecake Bites are now baked, chilled, and sprinkled with edible magic. But before we wrap up this magical baking adventure, let’s go over some of the most common frequently asked questions (FAQs) to help you troubleshoot, store, and serve your unicorn creations perfectly.
I’ll also share a few extra pro tips to make sure your cheesecake bites turn out perfect every single time. Let’s dive in!
FAQ: Your Cheesecake Questions Answered!
1. How do I prevent my cheesecake bites from cracking?
Cracks in cheesecake happen when the batter is overmixed or when the cheesecakes cool too quickly. To prevent this:
- Do not overbeat the batter once you add the eggs.
- Bake at a low temperature (325°F) and avoid overbaking.
- Cool gradually—let them sit in the oven for a few minutes before removing them.
2. Can I make these in advance?
Absolutely! Unicorn Cheesecake Bites actually taste better when made ahead because chilling them overnight enhances their flavor. You can make them up to 3 days in advance and store them in the refrigerator in an airtight container.
For longer storage, freeze them (without decorations) for up to 2 months!
3. Can I use a different crust?
Yes! While graham cracker crust is the classic choice, you can try:
- Oreo crust – for a chocolatey twist 🍫
- Vanilla wafer crust – for a softer, buttery flavor
- Gluten-free cookie crust – for a gluten-free version
Simply swap the graham cracker crumbs with an equal amount of your preferred crushed cookies.
4. Can I use gel food coloring instead of liquid food coloring?
Yes! In fact, gel food coloring is recommended because it’s more vibrant and doesn’t affect the consistency of the cheesecake batter.
Use just a tiny drop at a time since gel food coloring is very concentrated.
5. How do I get a more dramatic swirl effect?
For extra bold swirls, try these tips:
- Use a skewer or toothpick to drag the colors through each other.
- Layer more colors instead of just dropping spoonfuls.
- Avoid overmixing—a few light swirls will keep the colors distinct.
6. Can I make these cheesecake bites without a muffin tin?
Yes! If you don’t have a muffin tin, you can:
- Use silicone cupcake molds placed on a baking tray.
- Make a no-bake cheesecake version by setting the batter in a square pan, then slicing into mini bites after chilling.
7. What’s the best way to serve Unicorn Cheesecake Bites?
These magical cheesecake bites are best served cold, straight from the fridge.
For parties, display them on a pretty dessert platter, and for extra fun, let guests add their own toppings like sprinkles and edible glitter!
Pro Tips for the Best Unicorn Cheesecake Bites
✅ Use room temperature ingredients – This ensures a smooth batter with no lumps.
✅ Don’t rush the chilling process – The longer they chill, the better they taste!
✅ Make mini cheesecake pops – Insert a popsicle stick into each bite before freezing for a fun, handheld treat.
✅ Have fun with the decorations! – The more creative, the better. Try different sprinkles, edible pearls, or even tiny unicorn toppers!
Unicorn Cheesecake Bites
- Author: Andrew Recipes
- Total Time: 2 hours 35 minutes
Description
These magical, bite-sized cheesecakes are creamy, colorful, and perfect for parties, birthdays, or any whimsical occasion! With a buttery graham cracker crust, swirls of pastel cheesecake, and a sprinkle of edible glitter, these treats are as fun to make as they are to eat!
Ingredients
For the Cheesecake Batter:
- 24 oz cream cheese, softened
- ¾ cup granulated sugar
- ¼ cup sour cream
- 1 tsp vanilla extract
- 3 large eggs
- Food coloring (pink, blue, purple)
For the Crust:
- 1 cup graham cracker crumbs
- 4 Tbsp unsalted butter, melted
For Decoration:
- Whipped cream
- Edible glitter
- Gold star sprinkles
Instructions
1️⃣ Preheat oven to 325°F (163°C) and line a muffin tin with paper liners.
2️⃣ Make the crust:
In a small bowl, mix graham cracker crumbs and melted butter until well combined.
Press 1 tablespoon of the mixture into the bottom of each muffin cup. Set aside.
3️⃣ Prepare the cheesecake batter:
In a large bowl, beat cream cheese until smooth.
Add sugar, sour cream, and vanilla extract. Mix until fully combined.
Beat in the eggs one at a time, ensuring each egg is fully mixed in before adding the next.
4️⃣ Color the batter:
Divide the cheesecake batter into three bowls.
Add pink, blue, and purple food coloring to each bowl, stirring until the colors are vibrant.
5️⃣ Layer the colors:
Drop spoonfuls of each color batter into the muffin cups to create a swirled unicorn effect.
Use a toothpick or skewer to gently swirl the colors together.
6️⃣ Bake the cheesecakes:
Bake for 18-20 minutes, or until the centers are just set.
Remove from the oven and cool in the pan for 1 hour.
7️⃣ Chill & decorate:
Transfer to the refrigerator for at least 2 hours to fully set.
Before serving, top each cheesecake bite with whipped cream, edible glitter, and gold star sprinkles.
Notes
- For a rainbow effect, use more colors like yellow and teal.
- Want extra crunch? Add ½ teaspoon of cinnamon to the crust for a hint of warmth.
- Make ahead: These cheesecakes store well for up to 3 days in the fridge.
- No muffin tin? Use a 9×9-inch pan and cut into squares after chilling.
- Prep Time: 15 minutes
- Cook Time: 20 minutes
Nutrition
- Serving Size: 12-16

