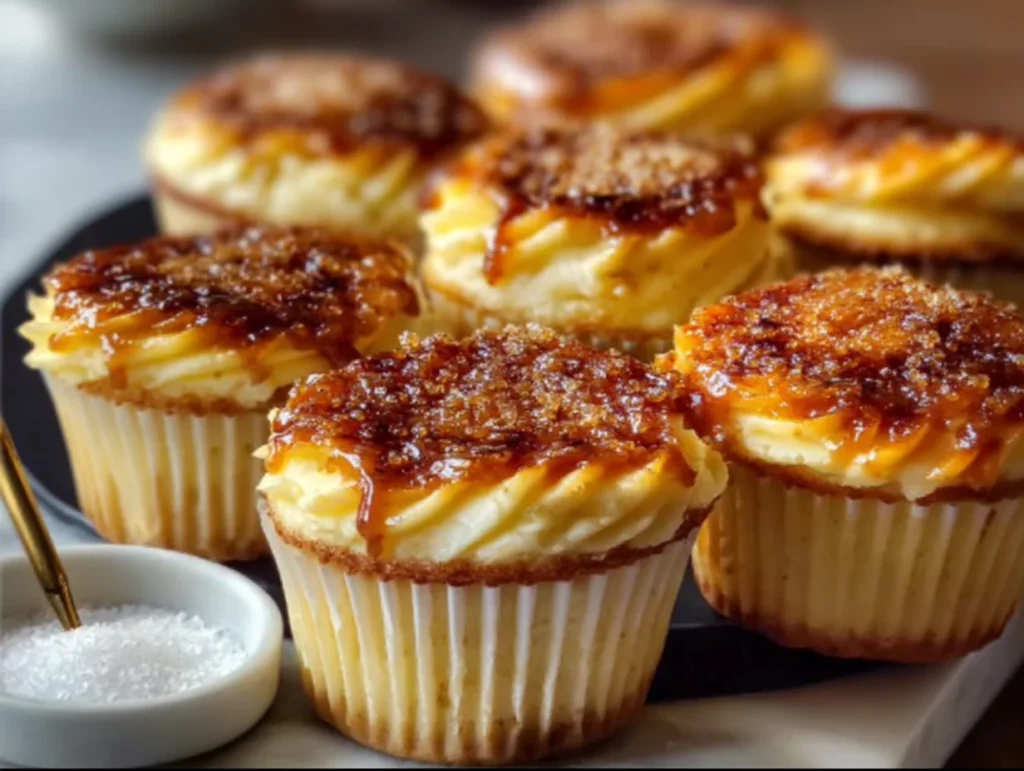
If you’ve ever struggled to decide between a velvety cheesecake and a classic crème brûlée, let me introduce you to the best of both worlds: Vanilla Bean Crème Brûlée Cheesecake Cupcakes. These adorable, individual treats blend the rich creaminess of cheesecake with that irresistible caramelized sugar crunch you get from crème brûlée. And let’s be honest—who doesn’t love a dessert you don’t have to share?
This recipe is one of my absolute favorites when I want to serve something elegant, but still low-stress. They’re easy enough to whip up for a weekend dinner party, yet fancy enough to impress even the pickiest guests. Plus, that little crack you hear when you tap your spoon against the brûléed sugar top? Pure satisfaction.
I remember the first time I made these for a family get-together—it was a warm spring evening, and I was experimenting with ways to elevate simple cheesecake. The combo of real vanilla bean and a torch-finished topping turned out to be a showstopper. Now, they’re on constant repeat any time I want to make something that feels a little extra.
Let’s dive right in and get started with the base of it all: the crust and creamy filling.

Ingredients You’ll Need
For the crust:
1 cup graham cracker crumbs
3 tablespoons granulated sugar
4 tablespoons melted butter
For the cheesecake filling:
16 oz cream cheese, softened
1/2 cup sour cream
2/3 cup granulated sugar
2 eggs
1 tablespoon vanilla bean paste or seeds scraped from 1 vanilla bean
1 teaspoon vanilla extract
For the topping:
Additional granulated sugar for brûlée topping
STEP 1: Prep Your Pan and Make the Crust
Start by preheating your oven to 325°F and lining a standard muffin tin with cupcake liners. This recipe makes about 12 cupcakes, so plan accordingly.
In a medium-sized bowl, mix together the graham cracker crumbs, granulated sugar, and melted butter. The mixture should look like damp sand and hold together when pressed—this is key for creating a sturdy base that won’t crumble under the filling.
Scoop about 1 tablespoon of the crust mixture into each cupcake liner. Use the back of a spoon or your fingers to press it down firmly. You want a solid, even layer that won’t shift once the filling is added.
Slide the tray into your preheated oven and bake for 5 minutes, just long enough to set the crust. Take them out and let them cool slightly while you whip up the filling.
STEP 2: Make That Creamy Cheesecake Filling
In a large mixing bowl, beat the softened cream cheese until smooth and lump-free. This part is important—start with room-temperature cream cheese and take your time here, because it forms the base of your entire filling. A smooth start equals a smooth finish.
Add in the sour cream and sugar, then mix until everything is fully combined. The sour cream adds a slight tang and helps balance the richness of the cream cheese.
Next, beat in the eggs, one at a time. Mix gently after each egg so you don’t incorporate too much air, which can lead to cracks in your cheesecake later on.
Now for the real flavor star: vanilla bean paste (or the seeds from a vanilla bean pod). Add this along with the vanilla extract, and mix just until everything is blended. If you’re using real vanilla bean, you’ll see those gorgeous black specks throughout the batter—they’re not just pretty, they pack an incredible aroma and depth of flavor.
STEP 3: Fill and Bake
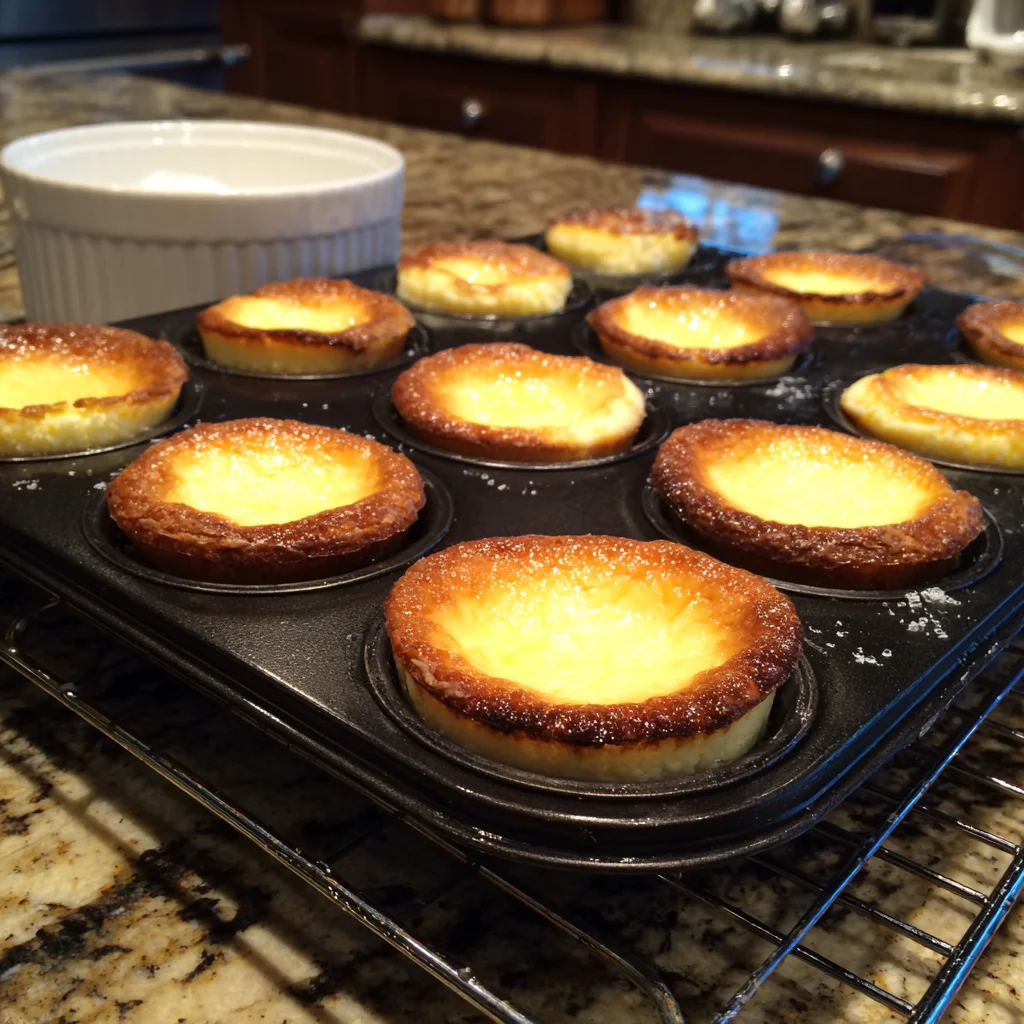
Spoon the cheesecake filling into each cupcake liner, right over the cooled crust. Fill each one about three-quarters full—they’ll puff slightly while baking, but then settle as they cool.
Slide the muffin tin back into the oven and bake for 18 to 22 minutes, or until the centers are just set. You’re looking for a gentle jiggle in the middle, not a full-on wobble. Resist the urge to overbake—they’ll continue to firm up as they cool.
Once out of the oven, let the cheesecakes cool at room temperature before transferring them to the fridge. Chill for at least 4 hours or overnight. This chilling step is non-negotiable; it gives the flavors time to develop and helps the texture become that dreamy, dense-but-silky cheesecake we all know and love.
Vanilla Bean Crème Brûlée Cheesecake Cupcakes: Finishing Touches and Expert Tips
Now that you’ve got your mini cheesecakes chilling and firming up in the fridge, it’s time for the fun part—turning these creamy little cupcakes into true crème brûlée hybrids. This next section will guide you through that perfect caramelized sugar topping and give you some tried-and-true tips for getting bakery-quality results right in your own kitchen.
This is also where things really get impressive. When you serve these to guests—or sneak one for yourself—you’ll be rewarded with that satisfying crack of the brûlée topping followed by the smooth, vanilla-scented cheesecake underneath. It’s an elegant, restaurant-style dessert, made in a muffin tin.
Let’s move on and finish strong.
STEP 4: Brûlée the Tops
Once your cheesecake cupcakes are fully chilled (again, this is crucial—they must be cold so they don’t soften under the heat), you’re ready to brûlée.
Take the cupcakes out of the fridge and gently remove the liners if you prefer a cleaner presentation. If you’re serving directly in the liners, that’s totally fine too.
Using a small spoon, sprinkle a thin, even layer of granulated sugar over each cheesecake top. You don’t want to pile it on too thick—just enough to fully coat the surface. A light layer gives the best crunch without overpowering the creamy filling underneath.
Now, fire up your kitchen torch and slowly move it across the surface in a circular motion. Keep the flame just above the sugar, watching closely as it begins to melt and then caramelize into that deep golden, glassy layer. You’ll know it’s done when the sugar is bubbling and turning an amber color.
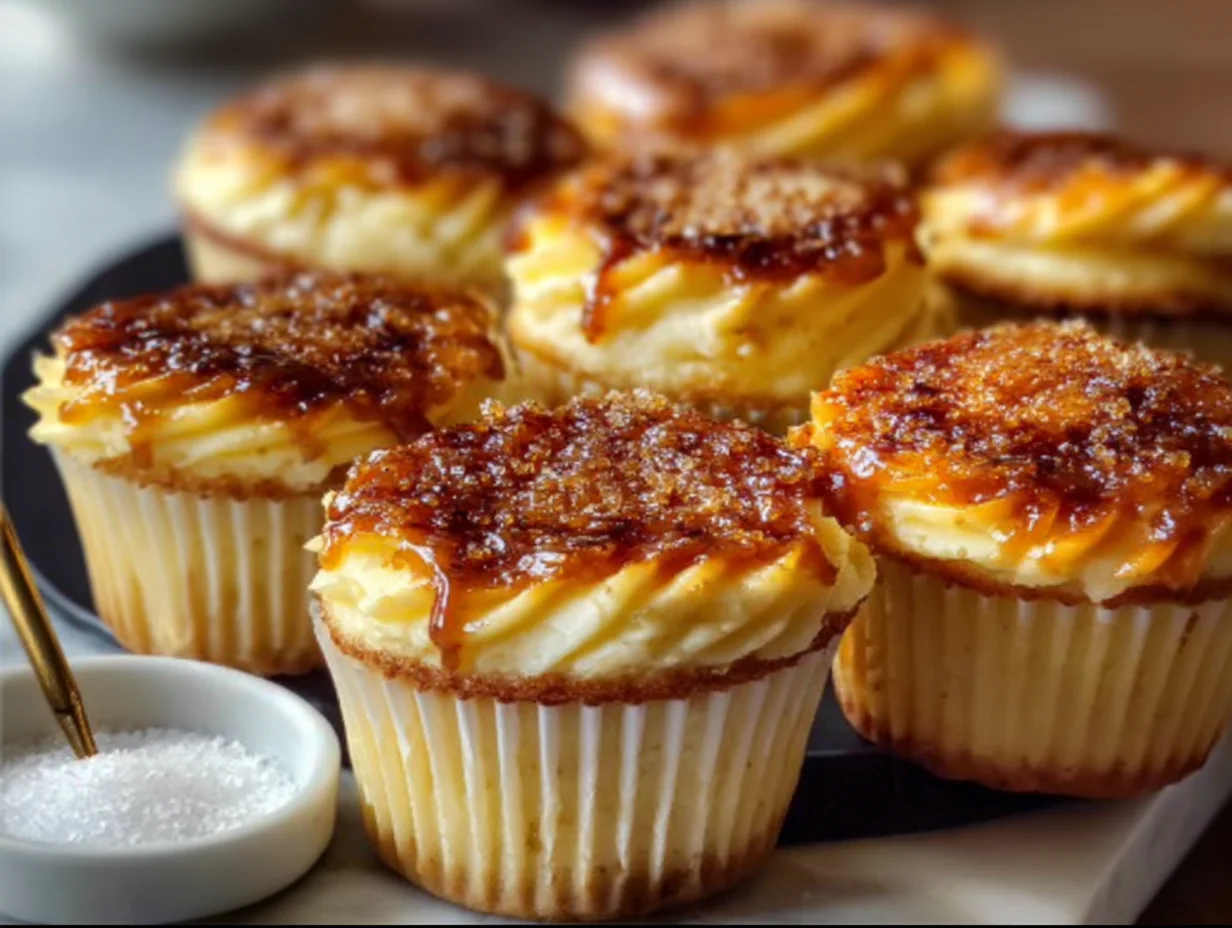
Let the topping cool and harden for about a minute before serving. That crisp shell is essential to the crème brûlée experience—it cracks beautifully under your spoon and gives way to the soft, cool cheesecake inside.
Don’t Have a Torch? Here’s What to Do
If you don’t own a kitchen torch (yet!), you can still enjoy that caramelized top. After sprinkling the sugar, place your cupcakes under a preheated broiler on the top rack of your oven.
Watch them constantly—this can go from golden to burnt in a matter of seconds. Broil until the sugar is melted and just beginning to brown, then pull them out and allow to cool before serving.
While this method works, it can be a bit tricky with cheesecake since the heat from the broiler is more intense and less precise. That’s why I highly recommend investing in a small kitchen torch if you’re planning to make these often—it’s a game changer.
Make-Ahead Tips and Storage Advice
One of the best things about these cheesecake cupcakes is how well they store. In fact, I’d say they’re even better when made a day ahead—the flavors deepen and the texture gets extra creamy.
Here are a few tips to help you get the most out of every batch:
Make Ahead: Bake and chill the cheesecakes the night before, but wait to add the sugar topping until just before serving. This ensures the brûlée layer stays crisp instead of turning sticky or soft.
Storing Leftovers: Keep any extra cupcakes in an airtight container in the fridge for up to 5 days. Again, brûlée just before eating.
Freezing: Yes, you can freeze them! Wrap individually (without the sugar topping), and freeze for up to a month. Thaw overnight in the fridge, then brûlée before serving.
Creative Variations to Try
Once you’ve mastered the base recipe, there’s so much room to get creative. Here are a few fun ideas to play with:
Citrus Twist: Add a teaspoon of lemon or orange zest to the filling for a fresh flavor contrast.
Bourbon Vanilla: Swap out regular vanilla extract for a splash of bourbon vanilla to add warmth and depth.
Chocolate Crust: Use chocolate graham crackers or crushed Oreos instead of regular graham crackers for a richer base.
Berry Topping: After brûléeing, add a fresh raspberry or sliced strawberry on top for a pop of color and tartness.
Espresso Infusion: Add a teaspoon of instant espresso powder to the cheesecake filling for a coffeehouse-style flavor.
These tweaks are simple but can give your cupcakes a whole new personality, perfect for different occasions or seasons.
Vanilla Bean Crème Brûlée Cheesecake Cupcakes: FAQ and Final Thoughts
You’ve baked, chilled, and brûléed your way to a truly special dessert—and now, it’s time to bring it all together. Whether you’re making these Vanilla Bean Crème Brûlée Cheesecake Cupcakes for a holiday, a celebration, or just because your sweet tooth called, this final section will help you serve them with confidence.
Before we wrap up, let’s go through some common questions that tend to come up when making these mini masterpieces.
Frequently Asked Questions
1. Can I make these cheesecake cupcakes without vanilla bean paste?
Yes! While vanilla bean paste adds that rich, speckled look and deep flavor, you can substitute it with an equal amount of pure vanilla extract. The flavor will still be delicious, though slightly less intense.
2. What’s the best way to tell when the cheesecake is done baking?
You’ll know they’re ready when the edges look set but the centers still have a slight jiggle. Avoid overbaking—cheesecake continues to cook and firm up as it cools. If the tops start to crack, they’ve gone too far.
3. My brûlée topping melted into the cheesecake—what went wrong?
This usually happens if the cheesecakes weren’t fully chilled before torching. Make sure they’ve been refrigerated for at least 4 hours, preferably overnight, before adding the sugar and caramelizing the top.
4. How thick should the sugar layer be for torching?
Keep it light—a thin, even layer is ideal. Too much sugar can lead to uneven melting and a chewy top instead of that crisp, glassy finish. Use about 1 to 1½ teaspoons per cupcake.
5. Can I use brown sugar for the topping instead of white granulated sugar?
Technically, yes, but it behaves differently under heat. Brown sugar can burn more quickly and might not produce the same smooth, glassy finish. Stick with white granulated sugar for the classic crème brûlée effect.
6. What if I don’t have a muffin tin—can I make this in a different pan?
You can try using a mini cheesecake pan or even ramekins, but the baking time will vary slightly. The key is keeping them individual-sized so you still get that cupcake-style presentation and the perfect sugar-to-cheesecake ratio.
7. Do I need to use a water bath for baking?
Not for this recipe! Because they’re baked in cupcake form and not as prone to cracking as a full-size cheesecake, a water bath isn’t necessary. That’s part of what makes this recipe so simple and approachable.
Final Thoughts: A Dessert Worth Repeating
There’s just something magical about combining two beloved desserts—classic cheesecake and the crackly-topped wonder of crème brûlée—into one, perfectly portioned cupcake. These Vanilla Bean Crème Brûlée Cheesecake Cupcakes are elegant without being fussy, indulgent without being overwhelming, and always a crowd-pleaser.
What I love most about this recipe is how adaptable it is. Stick with the classic vanilla bean version the first time, then feel free to get creative with flavors, crusts, and toppings. You’ll quickly find that this base recipe is one you’ll come back to again and again.
If you make these, I’d love to hear how they turn out! Did you try any fun variations? Share your results in the comments—I’m always excited to see how others make a recipe their own.
And if you’re hosting a get-together or just treating yourself to something special, don’t be surprised if these little cupcakes steal the show. That first bite—with the crack of the brûlée and the creamy cheesecake underneath—is pure dessert magic.
Print
Vanilla Bean Crème Brûlée Cheesecake Cupcakes
- Author: Andrew Recipes
Description
Vanilla Bean Crème Brûlée Cheesecake Cupcakes combine the creamy richness of classic cheesecake with the caramelized sugar topping of crème brûlée, all nestled in a cupcake liner for individual indulgence. Infused with real vanilla bean, these mini desserts offer an elegant and satisfying experience with every bite.
Ingredients
For the crust
1 cup graham cracker crumbs
3 tablespoons granulated sugar
4 tablespoons melted butter
For the cheesecake filling
16 oz cream cheese, softened
1/2 cup sour cream
2/3 cup granulated sugar
2 eggs
1 tablespoon vanilla bean paste or seeds scraped from 1 vanilla bean
1 teaspoon vanilla extract
For the topping
Additional granulated sugar for brûlée topping
Instructions
Preheat the oven to 325°F and line a muffin tin with cupcake liners. In a bowl, mix graham cracker crumbs, sugar, and melted butter until the texture resembles wet sand. Press about a tablespoon of the mixture into the bottom of each cupcake liner to form the crust. Bake for 5 minutes, then let cool slightly.
In a large mixing bowl, beat cream cheese until smooth. Add sour cream and sugar, mixing until well combined. Beat in the eggs one at a time, then mix in vanilla bean paste and vanilla extract. Spoon the cheesecake filling over each crust, filling about three-quarters full.
Bake the cheesecakes for 18 to 22 minutes, or until the centers are just set. Allow to cool at room temperature, then chill in the refrigerator for at least 4 hours or overnight.
Just before serving, sprinkle a thin, even layer of granulated sugar over each chilled cheesecake cupcake. Use a kitchen torch to caramelize the sugar until golden and crisp. Let the topping cool and harden for a minute before serving.
Notes
Make sure the cheesecakes are fully chilled before torching to prevent the filling from softening under the heat. If you don’t have a torch, place the sugar-topped cupcakes under a broiler briefly while watching closely to avoid burning. Store leftovers without the brûlée topping and torch just before serving for the best texture.

