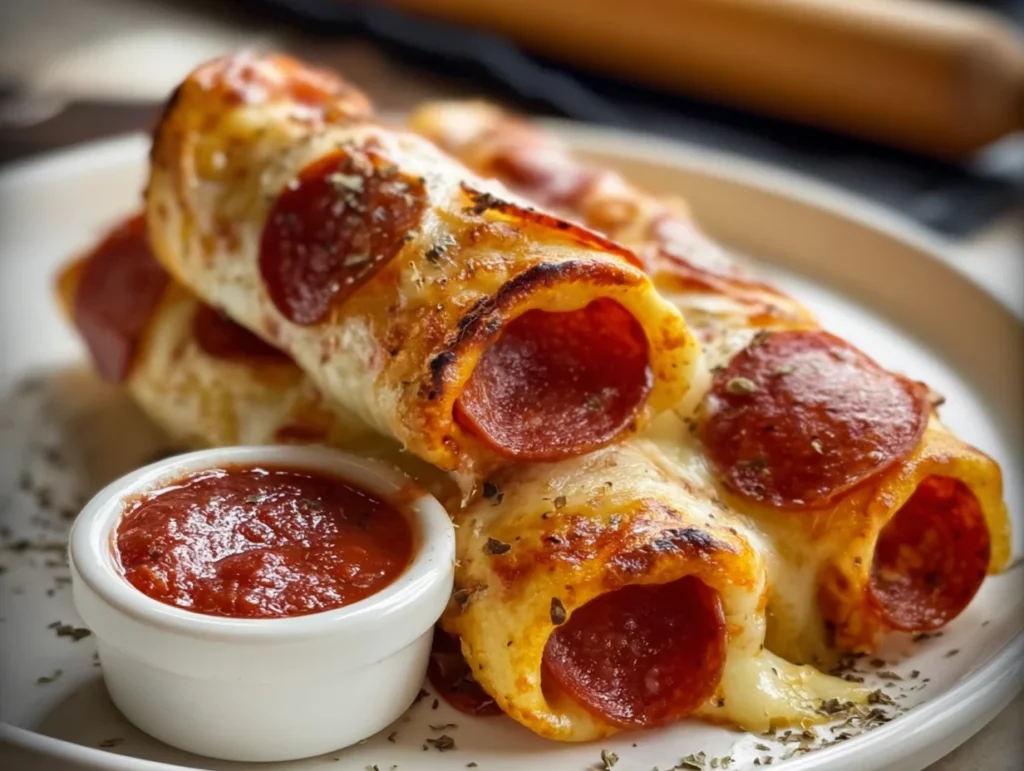
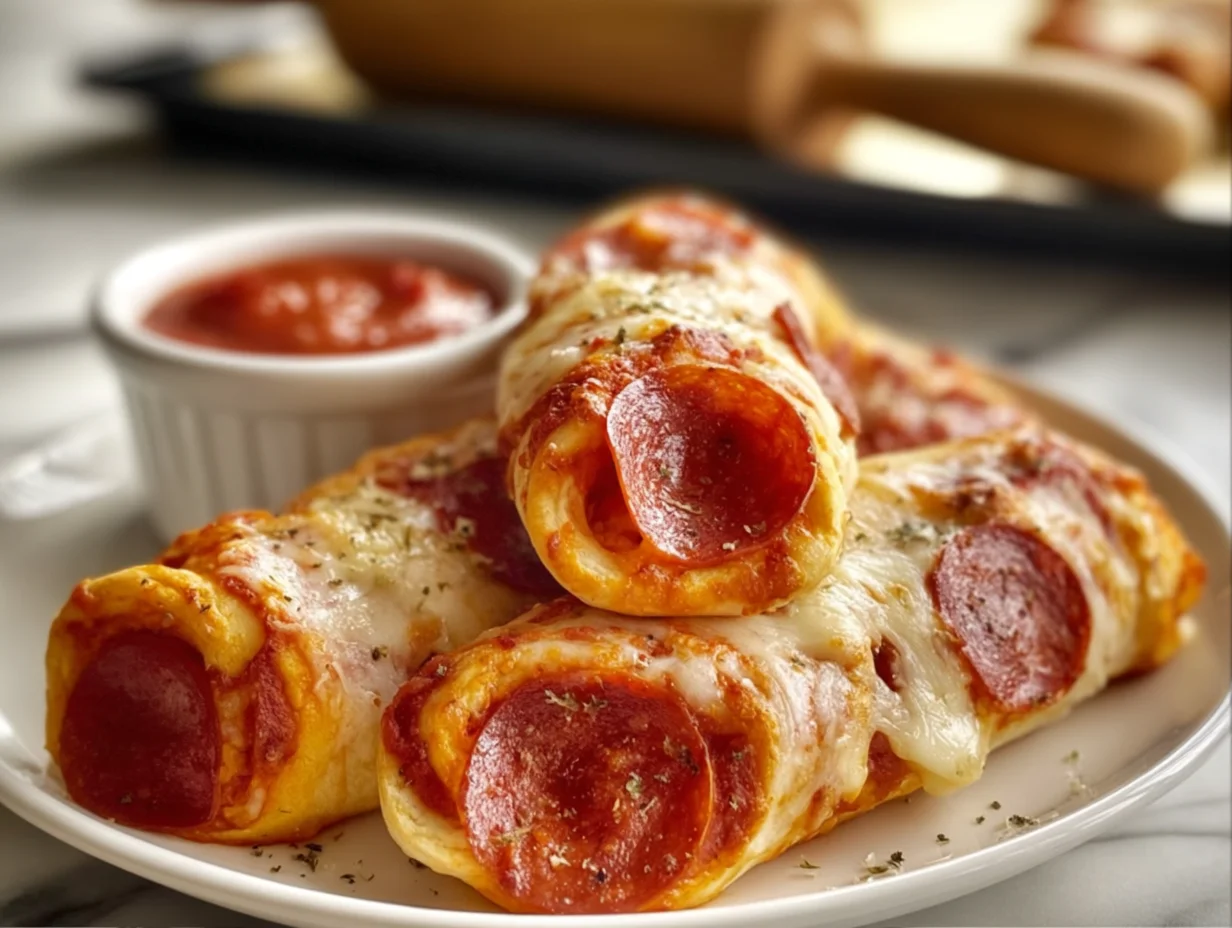
If you’re anything like me, pizza is basically its own food group. But sometimes you just want that delicious pizza flavor in a bite-sized, easy-to-eat form—enter these Homemade Pepperoni Pizza Rolls. Think soft, golden dough filled with gooey mozzarella, tangy pizza sauce, and crispy pepperoni, all rolled up into warm, cheesy perfection. Whether you’re feeding a hungry family, hosting a game day get-together, or just craving a savory snack on a lazy Sunday, these pizza rolls check every box.
These rolls have officially earned “most requested snack” status at our house. The best part? They’re easier to make than they look, and the dough is practically foolproof—even if you’re not a seasoned baker. I love recipes that feel a little bit fancy but are secretly super simple. This is one of those. And once you get the hang of the basic version, you can play around with fillings and flavors to make them your own.
So let’s dive right in and get rolling—literally.
PREPPING YOUR DOUGH & GETTING STARTED
Ingredients You’ll Need
For the dough:
2¼ teaspoons active dry yeast
1 cup warm water
1 tablespoon sugar
2½ cups all-purpose flour
1 teaspoon salt
1 tablespoon olive oil
For the filling:
1 cup shredded mozzarella cheese
½ cup sliced pepperoni
⅓ cup pizza sauce
½ teaspoon Italian seasoning
1 egg, beaten (for egg wash)
This recipe starts with a simple, soft pizza dough that makes the perfect base. If you’re short on time, store-bought dough works in a pinch, but homemade really takes it up a notch. The dough is soft, fluffy, and has just the right amount of chewiness to hold all that delicious filling.

STEP 1: Activate the Yeast
In a small bowl, combine the warm water, sugar, and active dry yeast. Let it sit for 5 to 10 minutes until the top looks foamy. This step is super important—if your yeast doesn’t foam, it may be expired or your water might’ve been too hot or too cold. You want that nice bubbly action to know the yeast is alive and ready to go.
STEP 2: Mix the Dough
In a large bowl, mix the all-purpose flour and salt. Pour in the foamy yeast mixture and add olive oil. Stir until a shaggy dough forms. At this point, I like to get in there with my hands—it helps bring the dough together better than a spoon ever could.
Transfer the dough to a lightly floured surface and knead for about 8 minutes. You’re looking for a smooth, elastic texture. If it feels too sticky, add a tiny bit more flour. If it’s dry, wet your hands slightly and knead it in. After kneading, shape the dough into a ball.

STEP 3: Let the Dough Rise
Place the dough ball into a greased bowl, turning it once to coat the top with oil. Cover the bowl with a clean kitchen towel or plastic wrap, and let it rise in a warm spot for about an hour or until it has doubled in size.
A little tip here—if your kitchen is chilly, you can preheat your oven to 200°F, turn it off, and let the dough rise inside with the door slightly cracked. It gives the yeast a cozy environment to do its thing.
STEP 4: Prep the Oven and Baking Sheet
While the dough is rising, go ahead and preheat your oven to 375°F. Line a baking sheet with parchment paper so your rolls won’t stick. You’ll thank yourself later when you’re not scrubbing baked-on cheese off your pan.
STEP 5: Roll Out the Dough
Once the dough has finished rising, punch it down gently to release the air. Then transfer it to a floured surface and roll it out into a large rectangle, about ¼ inch thick. Don’t worry about making it perfect—just aim for even thickness so everything bakes evenly.
Rolling, Filling, and Baking Your Homemade Pizza Rolls to Perfection
Alright, now that we’ve got our soft and fluffy dough rolled out into a beautiful rectangle, it’s time for the fun part—filling and rolling! This is where the whole recipe starts to come together, and your kitchen will start to smell like your favorite pizzeria. The great thing about this recipe is how customizable it is, but even the basic version is downright irresistible.
Let’s pick up right where we left off and finish making these delicious pepperoni pizza rolls. Don’t worry if it’s your first time working with rolled dough—just go slow, and I promise you’ll be surprised by how easy and satisfying it is.
STEP 6: Add the Sauce and Toppings
Start by spreading your ⅓ cup of pizza sauce evenly across the rolled-out dough. Try to leave about a half-inch border around the edges so the sauce doesn’t ooze out when rolling. I like using a spoon or a small offset spatula for this part—it gives you a little more control.
Next, sprinkle the shredded mozzarella cheese all over the sauce. Try to distribute it evenly so every bite gets that gooey, cheesy goodness.
Then layer on the sliced pepperoni. You can use as much or as little as you like, but I usually make sure the entire surface has a nice, even layer. A little Italian seasoning sprinkled over the top adds that perfect final touch—it really brings all the classic pizza flavors together.
STEP 7: Roll It Up
Now comes the part that might feel intimidating—but don’t worry, it’s easier than it looks.
Starting from the long edge of the rectangle, begin tightly rolling the dough into a log, just like you would a cinnamon roll. Take your time and keep the roll as even as possible. If anything tries to fall out (and it might!), just tuck it back in as you go.
Once you’ve got your log rolled up, pinch the seam gently to seal it shut.
STEP 8: Slice the Rolls
Using a sharp knife, slice the log into 12 even pieces. If your dough is a bit soft or sticky, you can pop the log in the fridge for 10 minutes before slicing to help firm it up.
I usually cut the log in half first, then each half into six pieces—it helps keep things even without needing a ruler.
Place the rolls cut-side up on your parchment-lined baking sheet, leaving a little space between each one to allow for spreading during baking.
STEP 9: Brush with Egg Wash
To get that beautiful golden finish, brush the tops of each roll with the beaten egg. This step makes a big difference in appearance and adds a subtle sheen that makes these look like they came from a bakery.
If you want an extra crispy edge, you can also brush the bottoms with olive oil before baking.
STEP 10: Bake to Golden Perfection
Place the baking sheet in your preheated 375°F oven and bake for 18 to 22 minutes, or until the rolls are golden brown and the cheese is bubbling. Every oven is a little different, so start checking around the 18-minute mark. You want the tops to be lightly browned and the dough cooked through in the center.
When they’re done, remove the tray from the oven and let the rolls cool slightly before serving. They’ll smell amazing, and the hardest part will be waiting long enough so you don’t burn your mouth on hot cheese. (Been there too many times.)
Optional but Delicious: Serve with Extra Dipping Sauce
These pizza rolls are fantastic on their own, but if you’ve got some extra pizza sauce (or even marinara), set it out for dipping. It’s the kind of touch that makes this snack feel like something you’d order at a restaurant—but better, because you made it yourself.
Make It Your Own: Fun Variations & Swaps
This recipe is super versatile, and once you’ve tried it once, don’t be afraid to play around. Here are a few fun ways to customize your rolls:
Add Veggies: Thinly sliced bell peppers, mushrooms, or black olives make great additions.
Try a Meat Lover’s Version: Add cooked crumbled sausage or Canadian bacon along with the pepperoni.
Go Spicy: Add a pinch of crushed red pepper flakes or use hot pepperoni for a kick.
Cheese it Up: Mix in a little Parmesan or provolone with your mozzarella for more depth.
And if you’re short on time or just not in the mood to make dough from scratch, you can absolutely use store-bought pizza dough. It won’t have quite the same homemade magic, but it’ll still be delicious.
FAQs and Final Thoughts on the Best Homemade Pizza Rolls
We’ve mixed, rolled, baked, and now… we eat! These Homemade Pepperoni Pizza Rolls are just as fun to make as they are to devour, and I have a feeling once you try them, you’ll be adding them to your regular rotation. Whether you’re planning a game night, hosting a party, or just looking for a fun weeknight dinner idea, these rolls are always a hit.
Before we wrap up, I want to cover some of the most common questions I get about this recipe. These quick FAQs will help you troubleshoot, plan ahead, and customize with confidence.
Frequently Asked Questions
1. Can I use store-bought dough instead of making my own?
Absolutely! If you’re in a pinch or just want to save time, a tube of refrigerated pizza dough or a ball of fresh dough from your grocery store’s deli section works just fine. Homemade dough gives the best flavor and texture, but store-bought is a great shortcut.
2. What’s the best way to keep the rolls from getting soggy?
Make sure not to overdo the sauce, and always leave a clean border around the edges when spreading it on. Too much sauce or cheese can cause soggy bottoms. Also, baking on parchment paper helps prevent excess moisture from making the rolls too soft.
3. Can I freeze these pizza rolls?
Yes! These rolls are very freezer-friendly. Let them cool completely after baking, then place them on a baking sheet in the freezer until firm. Once frozen, transfer them to a freezer-safe bag or container. Reheat in the oven at 350°F for about 10-12 minutes or until warmed through.
4. How long do leftovers last in the fridge?
Stored in an airtight container, leftover pizza rolls will keep for up to 3 days in the refrigerator. Reheat in the oven or toaster oven for best texture—microwaving works in a pinch, but the rolls may turn a bit soft.
5. Can I make the dough ahead of time?
Yes! You can prepare the dough up to 24 hours in advance. After kneading, let it rise once, then punch it down and store it in the fridge in a covered bowl. Bring it to room temperature before rolling out and continuing with the recipe.
6. What dipping sauces go well with these pizza rolls?
Classic pizza sauce or marinara is a go-to, but ranch dressing, garlic butter, or even spicy sriracha mayo are great options too. Don’t be afraid to mix it up based on your crowd.
7. Can I make these vegetarian?
Definitely. Just skip the pepperoni and add more cheese or your favorite veggies—think mushrooms, spinach, or roasted red peppers. Just be sure to slice any veggies thin and pat them dry so they don’t release too much moisture during baking.
Final Thoughts: These Pepperoni Pizza Rolls Are Always a Win
If there’s one thing I love about this recipe, it’s how fun and flexible it is. The process is straightforward, the ingredients are pantry-friendly, and the end result is pure comfort food. Whether you’re serving these as an appetizer, a kid-friendly lunch, or a late-night snack, they always disappear fast.
One of my favorite things to do is make a double batch—one for now and one to freeze. That way, future-you has a warm, cheesy, homemade snack ready to go without lifting a finger. You really can’t beat that.
I hope you give these Homemade Pepperoni Pizza Rolls a try and love them as much as we do. If you make them, I’d love to hear how it went—feel free to drop a comment with your favorite add-ins or any fun variations you tried.
Print
Homemade Pepperoni Pizza Rolls
- Author: Andrew Recipes
Description
These homemade pepperoni pizza rolls are a fun and delicious twist on traditional pizza. Made with soft, fluffy dough and filled with gooey mozzarella cheese, savory pepperoni, and flavorful pizza sauce, they’re perfect as a snack, appetizer, or party food. Easy to make and even easier to eat, these rolls are a crowd-pleaser for both kids and adults.
Ingredients
For the dough
2¼ teaspoons active dry yeast
1 cup warm water
1 tablespoon sugar
2½ cups all-purpose flour
1 teaspoon salt
1 tablespoon olive oil
For the filling
1 cup shredded mozzarella cheese
½ cup sliced pepperoni
⅓ cup pizza sauce
½ teaspoon Italian seasoning
1 egg, beaten (for egg wash)
Instructions
In a small bowl, combine the warm water, sugar, and yeast. Let it sit for about 5 to 10 minutes until foamy.
In a large bowl, mix the flour and salt. Add the yeast mixture and olive oil, then stir until a dough forms. Knead on a lightly floured surface for about 8 minutes until the dough is smooth and elastic.
Place the dough in a greased bowl, cover, and let it rise in a warm area for 1 hour or until doubled in size.
Preheat the oven to 375°F and line a baking sheet with parchment paper.
Once the dough has risen, punch it down and roll it out on a floured surface into a large rectangle about ¼ inch thick.
Spread the pizza sauce evenly over the dough, leaving a small border around the edges. Sprinkle with mozzarella cheese, then layer the pepperoni slices over the top. Lightly sprinkle with Italian seasoning.
Starting from the long edge, carefully roll the dough into a tight log. Use a sharp knife to slice the roll into 12 even pieces.
Place the rolls cut-side up on the prepared baking sheet. Brush the tops with beaten egg for a golden finish.
Bake for 18 to 22 minutes or until the rolls are golden brown and the cheese is bubbling.
Let cool slightly before serving with extra pizza sauce for dipping if desired.
Notes
For a crispier edge, lightly brush the bottom of each roll with olive oil before baking. You can use store-bought pizza dough for a quicker version. These rolls are freezer-friendly—just cool completely, freeze on a tray, and transfer to a bag for up to one month. Reheat in the oven until warmed through. Add other toppings like mushrooms, olives, or bell peppers for a custom flavor.

