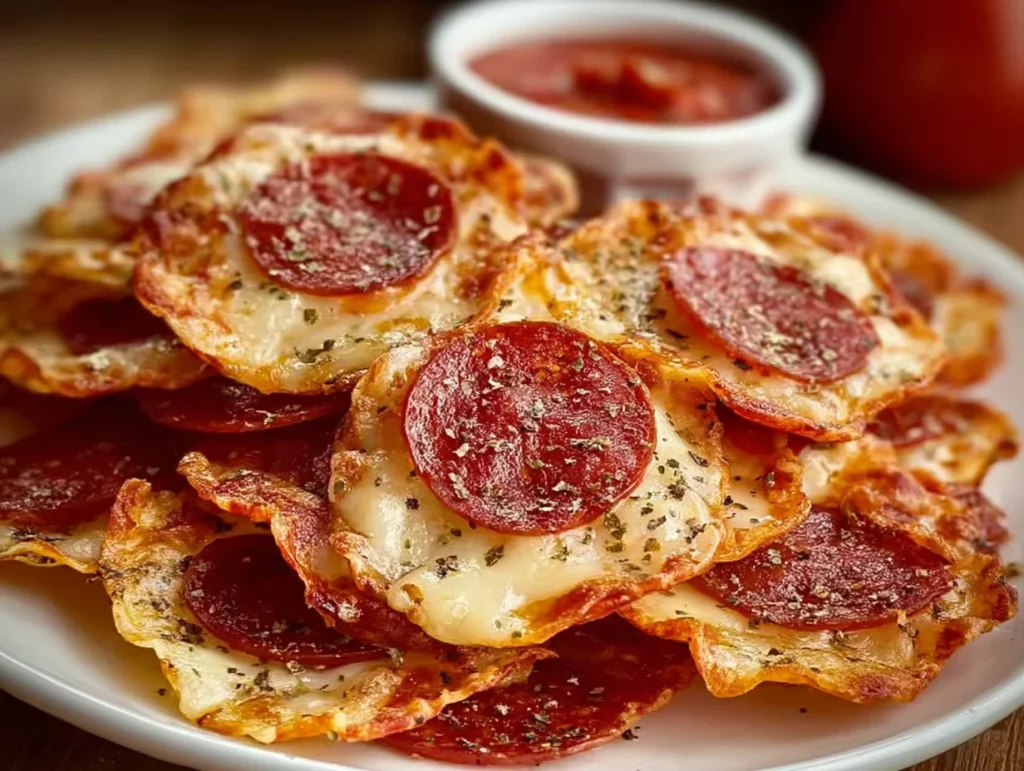
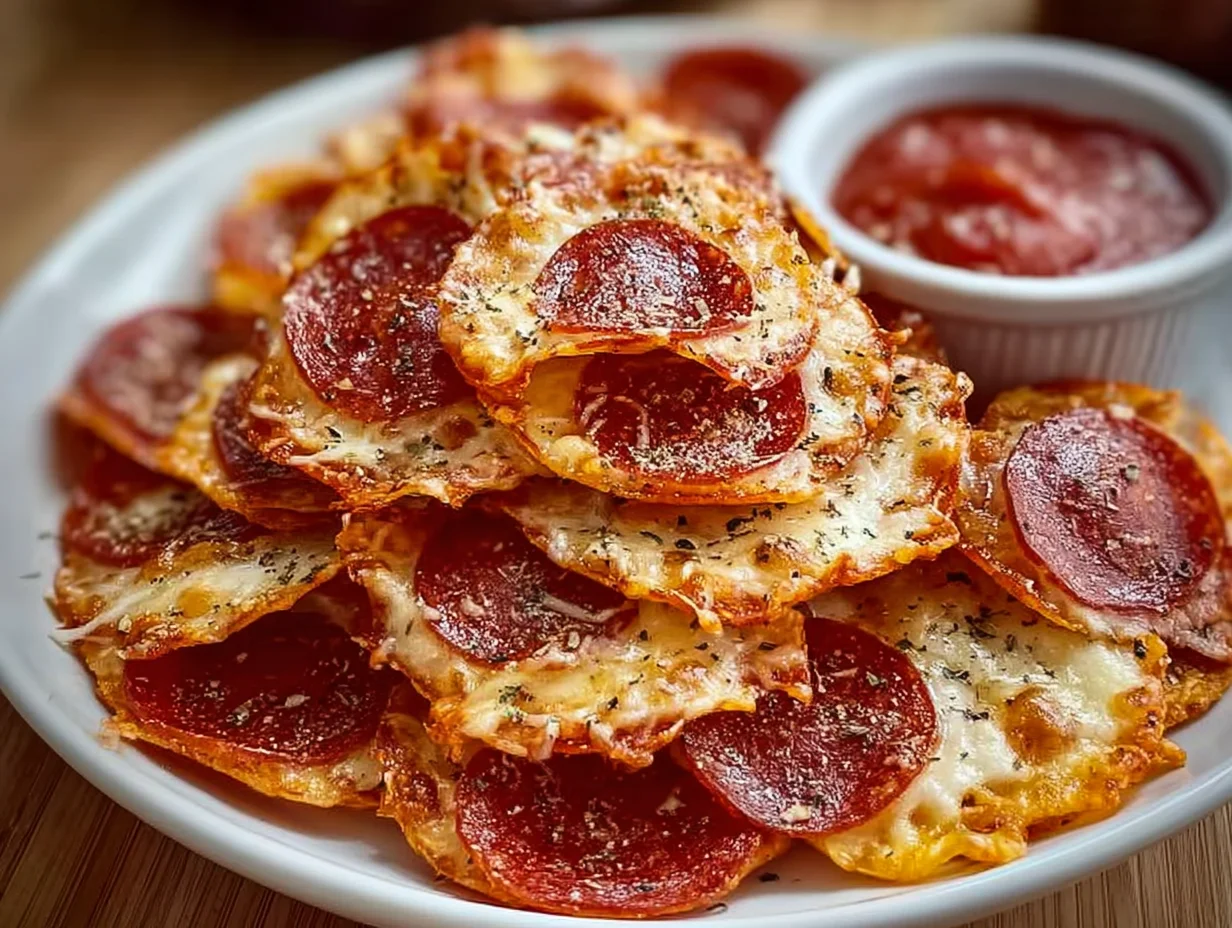
Craving something crispy, cheesy, and packed with pizza flavor—but without all the carbs and hassle of baking a full pie? Let me introduce you to your new favorite snack: Pepperoni Pizza Chips. These little bites of joy are exactly what they sound like—crispy, cheesy rounds of pepperoni that give off serious pizza vibes without the crust. They’re quick, easy, and totally addictive (you’ve been warned).
Whether you need a last-minute appetizer for game night, a quick after-school snack, or something savory to satisfy those late-night cravings, these pepperoni chips have you covered. And the best part? They’re made with just a handful of ingredients and take less than 10 minutes in the oven. Seriously, it doesn’t get much easier than this.
I first made a batch of these during a lazy weekend when I didn’t feel like making a full meal but still wanted something warm and comforting. The fridge had pepperoni, some shredded mozzarella, and a little jar of pizza sauce left over from the night before—and boom! Pepperoni pizza chips were born. Since then, they’ve become a go-to in our house, especially when we’re doing low-carb days or just want a snack that feels like a treat without the guilt.
These chips are also a fun one to make with kids—there’s no dough to deal with, and they love sprinkling the cheese and seasoning on top. And if you’re entertaining? Trust me, put a tray of these out and watch them disappear in seconds.
Alright, let’s get into it!
Ingredients You’ll Need:
24 slices of pepperoni
1 cup shredded mozzarella cheese
1 teaspoon Italian seasoning
1 tablespoon grated Parmesan cheese
Warm pizza sauce for dipping (optional but highly recommended)
STEP 1: Preheat and Prep
Start by preheating your oven to 400°F. Line a baking sheet with parchment paper—this is super important because it prevents sticking and helps everything crisp up nicely.
Now, lay out your pepperoni slices in a single layer on the baking sheet. Make sure they’re spaced slightly apart so the cheese doesn’t melt into one big mass (though honestly, that wouldn’t be the worst thing either!).
STEP 2: Load Them Up with Cheese and Seasoning
Next, take a small pinch of shredded mozzarella cheese and mound it right on top of each slice of pepperoni. You don’t need a ton—just enough to create that melty, gooey layer that gives these chips their pizza personality.
Then sprinkle each one with a little Italian seasoning for that classic herby flavor, followed by a light dusting of grated Parmesan cheese. That Parmesan is going to get beautifully golden in the oven and add a little salty sharpness that really takes these over the top.
If you like things spicy, you can toss a few crushed red pepper flakes in the mix too.

STEP 3: Bake Until Bubbly and Crisp
Slide the tray into your preheated oven and bake for 6 to 8 minutes. Keep a close eye on them—once the cheese is bubbly and lightly golden, and the edges of the pepperoni start to curl up and crisp, they’re ready.
Remember, they’ll crisp up even more as they cool, so don’t worry if they’re not super crunchy the second you pull them out of the oven.
STEP 4: Cool Slightly Before Serving
Let the chips cool right on the pan for about 2 to 3 minutes. This is where the magic happens—they’ll firm up, the cheese will set, and you’ll be left with a crispy, cheesy, pizza-flavored chip that’s basically snack perfection.
At this point, you can serve them as-is, or get fancy and pair them with a little bowl of warm pizza sauce for dipping. Totally optional, but totally delicious
Making the Most of Your Pepperoni Pizza Chips: Tips, Variations & More
So now that you’ve got the basics down—crispy pepperoni, melty cheese, and all that pizza goodness—it’s time to level up. These pepperoni pizza chips are awesome as-is, but with just a few tweaks, you can easily customize them to fit your taste, dietary needs, or what you happen to have in the fridge.
In this section, we’ll continue the recipe with some helpful tips, storage advice, and creative variations. Whether you’re following a low-carb lifestyle, entertaining guests, or just trying to use up what’s in the pantry, there’s a way to make this snack work for you.
Let’s keep going!

STEP 5: Experiment With Toppings and Flavors
One of the best parts about this recipe is how flexible it is. Once you’ve nailed the base, you can start getting creative. Here are some easy add-ins and swaps to change up the flavor:
Add a dash of crushed red pepper before baking if you like a bit of heat.
Sprinkle on some garlic powder or onion powder for an extra savory kick.
Chopped fresh basil added after baking gives a fresh, herby finish—perfect if you’re going for that Margherita pizza vibe.
Try a light dusting of Italian-style breadcrumbs over the cheese before baking for a bit of extra crunch (not low-carb, but definitely delicious).
Don’t be afraid to test out different cheese combos either. A little shredded cheddar, provolone, or even smoked gouda can add a whole new depth of flavor.
STEP 6: Make a Lighter or Healthier Version
If you’re watching calories or want a lighter option, you’ve got a few simple swaps that still taste amazing:
Use turkey pepperoni instead of traditional pork-based slices. They crisp up just as well and cut down on fat.
Choose part-skim mozzarella or another reduced-fat cheese.
Skip the Parmesan if you’re watching sodium—it’s flavorful but salty, so you can leave it out or go lighter.
These tweaks make the chips a bit more guilt-free while still delivering on flavor and crunch.
STEP 7: How to Store and Reheat Leftovers
If you somehow manage to not eat the entire tray in one sitting (no judgment if you do), storing and reheating is super easy.
Storage: Let the chips cool completely and then place them in an airtight container. Keep them in the fridge for up to 3 days.
Reheating: To bring back their crispiness, pop them in a preheated oven at 375°F for about 3-5 minutes. You can also use an air fryer if you have one—just a couple of minutes and they’re back to life.
Microwaving them isn’t the best option, since it tends to make them soft instead of crispy.
STEP 8: Serving Suggestions
While these pepperoni pizza chips are awesome all on their own, they also pair really well with other dishes and dips. Here are a few ideas for how to serve them:
Dip them in marinara or pizza sauce (warm is best) for a true pizza experience.
Use them as a crunchy salad topper—seriously, they’re incredible over a Caesar salad.
Crumble a few over a bowl of soup or chili for a cheesy, meaty crunch.
Include them on a low-carb charcuterie board alongside olives, cheese cubes, nuts, and pickles.
If you’re hosting, you can even make a double batch and lay them out on a platter with a few dipping sauces. It’s a snack that looks fancy but takes almost no effort—which, let’s be honest, is the best kind of snack.

Bonus Tip: Make-Ahead for Parties or Meal Prep
Yes, you can totally make these ahead of time! Just bake a batch, let them cool, and store them in the fridge. When party time comes around, reheat them in the oven or air fryer, and they’ll be good as new. You can even prep the tray ahead of time—assemble the pepperoni with cheese and seasoning, then cover and refrigerate until you’re ready to bake.
This makes it super convenient if you’re entertaining or just want to have a few low-carb snacks on hand during the week.
Pepperoni Pizza Chips FAQ + Final Thoughts
By now, you’ve seen just how easy and customizable these pepperoni pizza chips can be. But before you head off to your kitchen to whip up a batch (or two), let’s tackle a few of the most common questions people have about this recipe. Whether you’re wondering about substitutions, how to get the perfect crisp, or what to serve them with, I’ve got you covered.
Frequently Asked Questions
1. Can I make these in the air fryer instead of the oven?
Yes! The air fryer actually works really well for this recipe. Just place the pepperoni slices with cheese into the air fryer basket (use parchment liners or foil for easier cleanup), and cook at 375°F for about 4-6 minutes. Keep an eye on them—they crisp up fast!
2. My chips aren’t crispy enough. What went wrong?
If your chips are a little soft, it could be that they didn’t bake quite long enough, or there was too much cheese on top. Try letting them cool longer on the baking sheet—this helps them firm up. For a crispier result next time, use thinner slices of pepperoni and slightly less cheese.
3. Can I use other types of cheese besides mozzarella?
Absolutely. Mozzarella gives that classic pizza flavor, but you can also try provolone, cheddar, Monterey Jack, or even a sprinkle of smoked gouda for something different. Just remember, softer cheeses may melt faster, so adjust baking time as needed.
4. Are these chips keto-friendly?
Yes, they’re naturally low in carbs and high in fat, making them a great snack for keto diets. Just be sure to check the labels on your pepperoni and cheese—some brands add sugars or fillers, so look for low-carb versions.
5. How long will they stay crispy after baking?
They’re best when eaten fresh, but if stored properly in an airtight container, they’ll stay crispy for about a day. After that, a quick reheat in the oven or air fryer will bring the texture back.
6. What’s the best way to serve these at a party?
Lay them out on a serving tray with small bowls of warm pizza sauce, ranch, or garlic butter for dipping. They also make a great topping for salads or casseroles if you want to add a little crunch.
7. Can I make a vegetarian version?
Sure! While you’ll lose the “pepperoni” part, you can experiment with zucchini slices, eggplant rounds, or even large sliced mushrooms as a base. Just bake them a little longer to remove excess moisture, and then add your cheese and toppings.
Final Thoughts: A Snack Worth Making Again (And Again)
There’s just something satisfying about a snack that’s this simple and this flavorful. Whether you’re serving them to guests or sneaking a few off the tray before anyone else notices (we’ve all done it), Pepperoni Pizza Chips are a winner every time.
They check all the boxes:
Quick to make
Totally customizable
Low-carb and keto-friendly
Packed with bold, cheesy pizza flavor
Crispy, snackable, and completely addictive
I love having these on hand when I’m craving something savory but don’t want to go all-out making a full pizza. They’re also great for meal prepping a few quick snacks for the week ahead.
If you try them out, I’d love to hear how you made them your own! Did you try a different cheese? Add some heat? Dip them in something unexpected? Let me know in the comments—I’m always looking for new ideas to mix it up.
Now, go preheat that oven and treat yourself. You deserve a snack this good.
Print
Pepperoni Pizza Chips
- Author: Andrew Recipes
Description
Pepperoni pizza chips are a quick, low-carb snack that brings all the bold, cheesy flavors of pizza in a bite-sized, crispy form. Made with just a few ingredients and ready in minutes, these savory chips are perfect for game day, party appetizers, or late-night cravings. Each chip delivers the satisfying crunch of pepperoni with the gooey, melty goodness of cheese, seasoned just right for that classic pizza flavor.
Ingredients
24 slices of pepperoni
1 cup shredded mozzarella cheese
1 teaspoon Italian seasoning
1 tablespoon grated Parmesan cheese
Warm pizza sauce for dipping (optional)
Instructions
Preheat the oven to 400°F and line a baking sheet with parchment paper. Arrange the pepperoni slices in a single layer, spacing them slightly apart.
Place a small mound of shredded mozzarella on top of each pepperoni slice. Sprinkle each with a pinch of Italian seasoning and a light dusting of Parmesan cheese.
Bake for 6 to 8 minutes or until the cheese is melted, bubbly, and lightly golden, and the pepperoni edges are crisp.
Remove from the oven and allow the chips to cool on the pan for 2 to 3 minutes. This helps them crisp up further.
Serve warm or at room temperature, optionally with warm pizza sauce for dipping.
Notes
You can use turkey pepperoni or low-fat cheese for a lighter version.
Add a pinch of crushed red pepper flakes for heat or some chopped basil for a fresh finish.
Leftover chips can be stored in an airtight container and reheated in the oven or air fryer to regain crispiness.
These are also excellent layered onto a salad or used as a crunchy topping for soups and casseroles.

