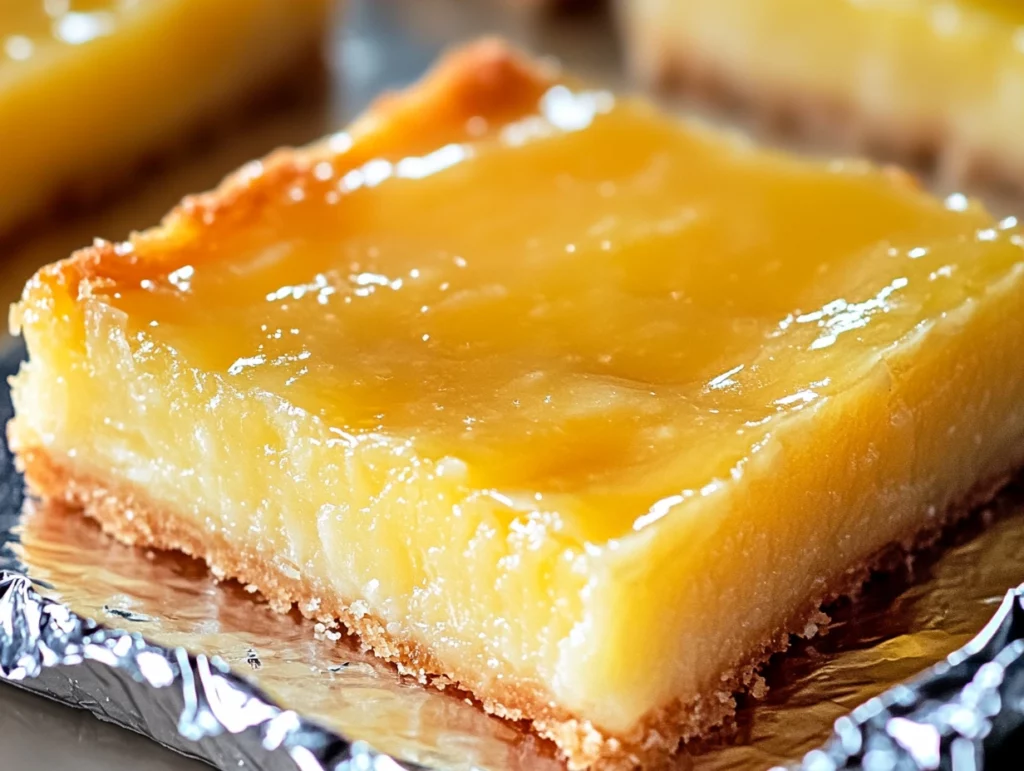
When you’re craving something sweet but don’t have the time or energy to spend hours in the kitchen, this Two-Ingredient Lemon Bars recipe is a game changer. With only two main ingredients, you can whip up these tangy, buttery bars in no time. Whether you’re hosting a last-minute get-together or need a quick dessert to satisfy your sweet tooth, this easy recipe is the answer!
I was introduced to these lemon bars during a family potluck, and I couldn’t believe how simple they were to make. After one bite, I was hooked! The tangy lemon flavor paired with the rich buttery base creates the perfect balance that makes these bars so irresistible. The best part? They require hardly any effort and you don’t need any baking experience to pull them off. Trust me, if I can make them, anyone can!
In this article, we’ll go through all the steps to make these Two-Ingredient Lemon Bars and I’ll share a few tips and tricks to make sure your bars turn out perfect every time. Let’s dive into it!

Ingredients You’ll Need:
1 box of lemon cake mix
1/2 cup of melted butter
That’s it! You don’t need eggs, flour, or any fancy ingredients—just the cake mix and butter. It’s as simple as it sounds.
Steps to Make Two-Ingredient Lemon Bars:
Step 1: Preheat the Oven and Prepare the Pan
Before we start mixing, let’s get the oven ready. Preheat it to 350°F (175°C). While it’s warming up, grease your baking pan. A standard 8×8 inch pan works best, but you can always adjust depending on what you have available. Use butter or non-stick spray to grease the pan so the bars don’t stick once they’re baked. Set the pan aside.
Step 2: Make the Dough
Now, grab a large mixing bowl and combine the lemon cake mix with the melted butter. Stir the mixture together until it forms a dough-like consistency. It should be thick but sticky. If it’s too dry, you can add just a splash more butter, but you want to avoid it being too runny. The goal is a dough you can press into the pan, so don’t worry if it’s not the same as traditional cake batter!
Step 3: Press the Dough into the Pan
Once the dough is ready, it’s time to transfer it into the prepared baking pan. Using your fingers or a spatula, gently press the dough into the pan, making sure it’s evenly spread out across the bottom. This will form the crust of your lemon bars. Don’t worry about making it perfect, as it will bake evenly and you’ll end up with a smooth, buttery base once it’s done.

Step 4: Bake the Bars
Pop the pan into your preheated oven and bake for 15-20 minutes. Keep an eye on it as it bakes, especially toward the end. The edges should turn a light golden brown, and if you insert a toothpick into the center of the bars, it should come out clean. If it does, your bars are ready to go! If it comes out a bit sticky, just give them another couple of minutes in the oven.
Step 5: Cool and Serve
Once your bars are done baking, remove them from the oven and allow them to cool completely in the pan. You might be tempted to dig in right away (I totally get it!), but letting them cool first will make them easier to cut into squares. When they’ve cooled down, slice them into bars, and they’re ready to be enjoyed!
Tips, Tricks, and Variations to Make Your Lemon Bars Even Better
Now that you’ve got the basics down, let’s take these Two-Ingredient Lemon Bars to the next level! While they’re already incredibly simple and delicious, there are a few extra touches you can add to personalize them or just make them a little more special. In this section, I’ll walk you through some tips and tricks, as well as a few variations to help you customize these bars to your liking.

Tips for Perfecting Your Lemon Bars
Tip 1: Don’t Overbake!
One of the key things to remember when making these lemon bars is to avoid overbaking them. Since this recipe doesn’t use traditional cake ingredients, the texture of the bars can be a little different. You want the edges to be a light golden brown, but you don’t want the center to get too firm. The toothpick test is your best friend here—once it comes out clean, it’s time to pull the bars out of the oven. Overbaking can make them too dry, and we definitely don’t want that!
Tip 2: Let Them Cool Completely Before Cutting
I know it’s hard to resist, but letting the lemon bars cool completely in the pan before you slice them is key. Cooling them will allow the texture to firm up, making it easier to cut them into neat squares. If you cut them while they’re still warm, they can get a bit messy and won’t hold their shape as well.
Tip 3: Use Fresh Lemon Zest for Extra Flavor
If you’re looking for an extra burst of lemony goodness, add some fresh lemon zest into the dough mixture. A teaspoon or so will give your bars a more intense lemon flavor, elevating the overall taste without making them overly tart. Fresh zest is always a great way to take any lemon dessert from good to great!
Tip 4: Powdered Sugar Finish
Want to add a little something extra to your bars once they’ve cooled? Dusting the tops with a light sprinkle of powdered sugar is the perfect finishing touch. Not only does it look pretty, but it also adds just the right amount of sweetness to balance the tanginess of the lemon. You can even do this right before serving for a fresh and clean look.
Variations You Can Try
1. Add a Lemon Glaze
If you want to go the extra mile and add a sweet, tangy glaze, it’s super easy! Simply mix powdered sugar with a tablespoon of lemon juice and drizzle it over the cooled bars. The glaze will add a glossy, sweet layer on top of your lemon bars and enhance that citrus flavor. It’s perfect if you want something a little fancier for a special occasion.
2. Make Them Into Lemon Cheesecake Bars
For a richer version of these bars, you can combine the cake mix and butter with some cream cheese to create a cheesecake-style lemon bar. Softened cream cheese mixed into the dough creates a smooth, creamy texture and adds a bit of tanginess. If you’re a fan of cheesecake, this is a fun variation to try.
3. Try Different Cake Mix Flavors
Although lemon cake mix is the star of this recipe, you can experiment with other cake mix flavors to create different kinds of bars. For example, you could use vanilla cake mix for a more neutral base, or even try a strawberry or blueberry cake mix for a fruity twist. You can mix and match depending on the flavor profile you prefer!
4. Add a Crunchy Topping
If you like a little texture with your bars, consider adding a crunchy topping. After pressing the dough into the pan, sprinkle crushed graham crackers, nuts (like almonds or pecans), or even a handful of crushed shortbread cookies over the top. This will give your lemon bars a bit of crunch and make them feel like a more indulgent dessert.
5. Make Them Gluten-Free
If you’re following a gluten-free diet, it’s easy to make this recipe work for you. Simply swap the regular lemon cake mix for a gluten-free version, and you’ll still get that tangy, buttery goodness. There are many gluten-free lemon cake mixes available, and they will work just as well in this recipe!

Serving Suggestions
These lemon bars are perfect for almost any occasion. Whether you’re serving them at a casual get-together, a potluck, or as a quick treat after dinner, they’re always a hit. They’re also a great snack to pack for lunches or to bring to work for an afternoon pick-me-up.
If you’re looking to pair these bars with something else, a nice cold glass of iced tea or lemonade would complement them perfectly. Or, for a fun twist, serve them with a scoop of vanilla ice cream on the side—nothing like that creamy cold contrast to the tangy lemon!
The beauty of these Two-Ingredient Lemon Bars is how versatile they are. You can make them as simple or as fancy as you like, but no matter how you serve them, they’re sure to be a crowd-pleaser.
FAQ and Conclusion – Everything You Need to Know About Two-Ingredient Lemon Bars
Now that you’re equipped with all the tips, tricks, and variations to make your Two-Ingredient Lemon Bars the best they can be, let’s address some of the most common questions readers have when making this easy recipe. After that, I’ll wrap things up with a few final thoughts and encourage you to give these bars a try!
Frequently Asked Questions (FAQ)
1. Can I use a different cake mix flavor for these bars?
Absolutely! While lemon cake mix is the traditional choice, you can get creative and try different cake mixes. Vanilla, strawberry, or even orange cake mix would work wonderfully. Each one will give you a slightly different flavor profile but will still be just as easy to make. The possibilities are endless, so don’t be afraid to experiment!
2. Can I make these bars in advance?
Yes, these lemon bars store really well! You can make them a day or two ahead of time and store them in an airtight container at room temperature. They’ll stay fresh and delicious. If you need to store them for longer, you can also refrigerate them for up to a week or freeze them for longer storage.
3. Can I add more butter to make the dough softer?
If you find that the dough is too thick or dry, you can add a little more melted butter, a tablespoon at a time, until it reaches the desired consistency. However, be cautious not to add too much, as it could make the bars too greasy. The key is to keep the dough thick enough to hold its shape while still being soft enough to press into the pan.
4. How do I know when the bars are done baking?
The easiest way to check is by doing the toothpick test. Insert a toothpick into the center of the bars; if it comes out clean or with just a few crumbs, they’re ready. If the toothpick comes out with batter on it, give the bars a few more minutes in the oven. Keep an eye on the edges too—they should be lightly golden brown when they’re finished.
5. Can I make these bars gluten-free?
Yes! You can easily make this recipe gluten-free by using a gluten-free lemon cake mix. There are many great options available, so you can still enjoy the same tangy and buttery goodness without any gluten. Just make sure to check the other ingredients to ensure everything is gluten-free.
6. Can I add a glaze or frosting on top?
Absolutely! A lemon glaze or a simple dusting of powdered sugar can add an extra touch of sweetness and flavor. To make a glaze, mix powdered sugar with lemon juice and drizzle it over the bars once they’ve cooled. Alternatively, you can frost them with a cream cheese frosting for an even richer treat. Both options are delicious!
7. How should I store leftover lemon bars?
Once your bars are completely cooled, store any leftovers in an airtight container. You can keep them at room temperature for up to two days or refrigerate them for up to a week. If you have a large batch, you can also freeze the bars for up to a month. Just be sure to wrap them tightly before freezing to prevent freezer burn.
Conclusion: Why You Should Try These Two-Ingredient Lemon Bars
These Two-Ingredient Lemon Bars are the perfect dessert for anyone looking for something quick, simple, and totally delicious. They’re the ideal treat for last-minute gatherings, potlucks, or when you just need a little something sweet. With minimal ingredients, easy steps, and endless variations, this recipe proves that sometimes the simplest things are the best.
Print
Two-Ingredient Lemon Bars
- Author: Andrew Recipes
Description
These Two-Ingredient Lemon Bars are an incredibly quick and easy dessert. The tangy lemon flavor from the cake mix combined with the buttery, soft crust makes for a delicious treat that’s perfect for any occasion. With minimal ingredients and no complicated steps, these bars are a great way to satisfy your sweet tooth without much effort.
Ingredients
1 box of lemon cake mix
1/2 cup of melted butter
Instructions
Preheat the oven to 350°F (175°C). Grease a baking pan, preferably 8×8 inches, with butter or non-stick spray.
Prepare the dough: In a large mixing bowl, combine the lemon cake mix with the melted butter. Stir until the mixture forms a dough-like consistency.
Press the dough into the prepared baking pan, spreading it evenly to cover the bottom.
Bake: Place the pan in the preheated oven and bake for 15-20 minutes, or until the edges are lightly golden and a toothpick inserted into the center comes out clean.
Cool and serve: Allow the bars to cool completely in the pan before cutting them into squares. Enjoy them as a simple, tangy treat!
Notes
For extra flavor, you can dust the cooled bars with powdered sugar before serving. If you like a more intense lemon flavor, you can add a bit of lemon zest or a splash of lemon juice to the dough mixture.

